Learning Resources > Tutorials > Getting Started with Maya > Assets > Lesson 2: Using assets
in a scene >
Manually binding attributes
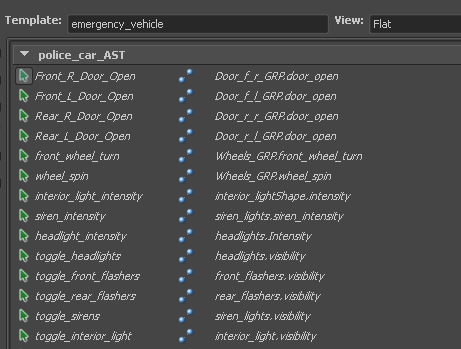
In order for your asset to be considered valid, every published name in the police_car_AST section must be bound to an attribute of the police car.
Currently, the door attributes are not bound because their internal node names are different (on the fire truck they are called Cab_door, while in the police car they are simply called Door), so the template is invalid. To fulfill this template, you must bind them manually.
 ) next to
police_car_AST and again next to Doors_GRP.
) next to
police_car_AST and again next to Doors_GRP.
 ) next
to Door_f_l_GRP.
) next
to Door_f_l_GRP.
A small green icon appears next to the published name indicating that it is now bound and the bind icon changes to an unbind icon. The name of the attribute it is bound to appears on the right side of the bind icon.
When you are finished all the icons in the police_car_AST section should be green. Your template is now valid.