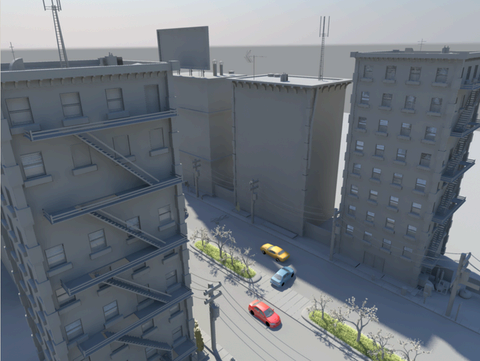
This example scene consists
of a city view with buildings and cars, with the mia_physicalsun and mia_physicalsky shaders
applied for lighting.
NoteThe mental ray for
Maya renderer is used in this example.
This example demonstrates
how to:
- use the mia_physicalsun and mia_physicalsky shaders
with color management
- set your Render View to
display floating point images
- render a .exr image
- enable color management in your Render
Settings window
- enable color management in your Render
View
- tweak the exposure and contrast of the Render
View image
- save your color managed output
Using mia_physicalsun and mia_physicalsky with
color management
If your scene includes
the mia_physicalsun and mia_physicalsky shaders,
you must disconnect the mia_physicalsky lens
shader from all cameras that you want to render from. Otherwise,
your result may appear incorrect.
- Select View > Camera Attribute
Editor > mental ray and
 the Lens
Shader attribute and select Break Connection to
break the connection between the lens shader and each of your cameras.
the Lens
Shader attribute and select Break Connection to
break the connection between the lens shader and each of your cameras.
Setting up your Render
View to display HDR images
In order to view 32-bit
floating point images in your Render View,
you must set your Render View display options
accordingly.
Method 1
- Select Window > Settings/Preferences
> Preferences > Rendering and select 32-bit
floating-point (HDR).
Method 2
- Select Display > 32-bit
floating-point (HDR) in the Render View window.
Render a .exr image
When rendering an image
using the .exr file format,
you must change your framebuffer type to 32-bit float. Otherwise,
your image will be clamped to [0, 1].
- Select OpenEXR under Image
Format in the Render Settings window, Common
tab, File Output section.
- In the Quality tab, Framebuffer section,
select RGBA (Float) 4x32 bit as your Data
type.
NoteA warning appears
if you have selected OpenEXR as your image format but
your data type is not set correctly.
Enable color management
in your Render Settings
- In the Render Settings: Common
tab, select Enable Color Management under Color
Management.
- Set the Default Output Profile to Linear.
This is the color profile used for your render output.
- Render your scene.
Enable color management
in your Render view
- In the Render View window,
select Display > Color Management to
display the ViewColorManager node.
- Set the Image Color Profile to Linear.
This is the color profile for your image source file.
NoteThis is the same
option that you selected for your Default Output Profile in
the Render Settings window.
- Set the Display Color Profile to sRGB
(gamma corrected). This is the recommended option for
displaying on computer monitors.
Tweak the exposure and
contrast of your Render View image
Tweak the Exposure and Contrast sliders
to view details in the over-bright and over-dark regions of the
image.
Save your color managed
output
After you have adjusted
the Exposure and Contrast settings,
you can save your color managed output.
- Select File > Save Image >
 and
select Save Color-Managed Image.
and
select Save Color-Managed Image.
NoteYou can also save
your raw image (without color management) by selecting the Save
Raw Image option.
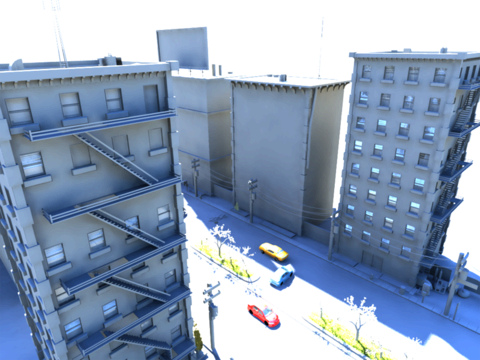
Render output
The following image is
the render output saved using the Save Color-Managed Image option,
but with the Display Color Profile set to Linear and
the Exposure and Contrast sliders
set to 0. This image is best used for compositing as it allows you
to apply additional calculations.
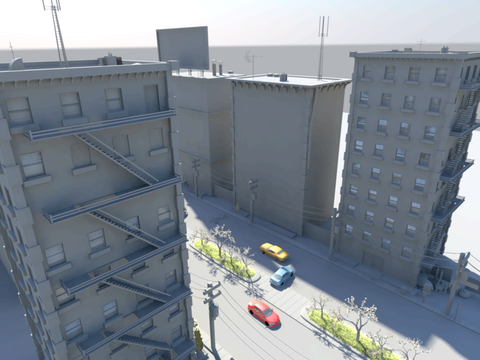
The following image is
the render output saved using the Save Color-Managed Image option,
but with the Display Color Profile set to sRGB
(gamma corrected) and with the Exposure and Contrast set
to custom values.
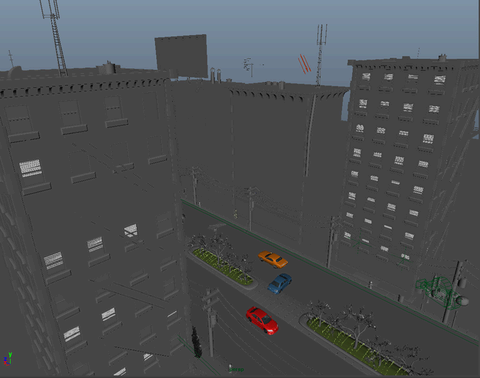
The following image was
rendered with the lens shader attached to the camera and with color
management disabled in the Render Settings window.
Use it as a reference and compare it to the previous two images.