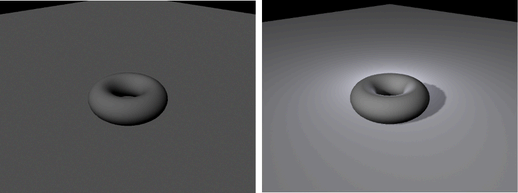
The newly rendered image has a shadow. If there was no fill light, detail would be lost in the shadowed area, as the shadow would be black. The rim highlights emphasize the curvature of the torus and help to differentiate the torus from the background.
When creating three-point lighting in a scene with multiple objects, typically there is a main light that provides the main lighting for the scene, and each object in the scene has a linked fill and rim light.
Your three-point lighting script only works for objects of medium scale located at the origin, but once the lights are created, you can tweak them to better suit your scene.