


Blending keyframe and motion
path animation
Blending between motion path and keyframe animation types is possible in Maya. Blending between the two animation types allows you to take advantage of the characteristics each animation type can provide without having to expend a lot of effort in determining where the change between the two types must occur.
In the steps that follow, you keyframe the aircraft to rise vertically from the floor surface and then travel along the motion path by blending between the two animation types. To accomplish this, you do the following:
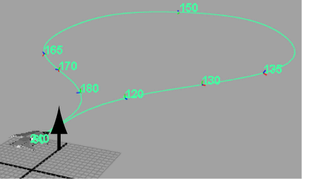
The path curve is repositioned above the ground plane in the scene view. The aircraft moves with the path curve because it is attached to the motion path.
To keyframe the motion for the aircraft
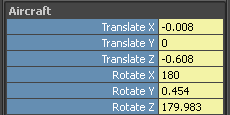
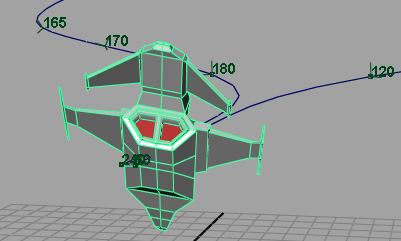
The aircraft is repositioned so it rests on the ground plane.
Keys are set for the selected channels. Keyframing these channels establishes a blending connection that will be discussed in subsequent steps.
The aircraft is rotated 90 degrees from its motion path position.
A keyframe is set for the aircraft.
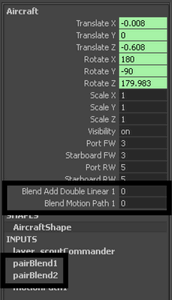
Additional channels appear in the Channel Box. When a keyframe is set for an object that already has motion path animation, the software automatically creates a connection to blend between the two animation types. These new channels are used to control the blend between the keyframe and motion path animation types. They control the blend for the Translation and Rotation attributes.
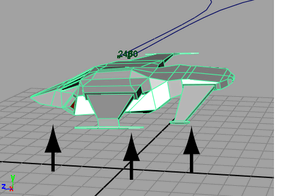
The aircraft rises above the ground plane and then stops at frame 40.
The animation stops because the motion path animation was shut off when the blend attribute was automatically created when you set the first keyframe. The blend attribute values are set to zero by default. When the blend values are set to zero, the keyframe animation has full influence on the object, and the path animation is shut off. When the blend values are set to one, the motion path has full influence on the object and the keyframing is shut off. When the blend values are between zero and one, the aircraft’s motion is blended between the keyframe and motion path animation.
In the next steps, you keyframe the blending attributes so the blending begins at frame 30 and ends at frame 70. This blends the two animation types together over a period of 40 frames.
To blend between the two animation types
A key is set for the blend starting point for the aircraft. At frame 30 the two animation types will begin to blend together.
A key is set for the blend ending point for the aircraft. At frame 70 the motion path animation will have full influence.
The two animation types are combined but the motion does not appear correct. The aircraft rotation flips upward momentarily when it begins to travel along the motion path.
The interpolation type for the rotations during the blending is not set correctly.
Setting the pairBlend Rot Interpolation setting to Quaternions changes how the rotations are interpolated during the blend. In this example, Quaternions provides a better interpolation type when blending between the keyframe and motion path animation. For more information see quaternion rotation in the Maya Help.
To edit the rotation interpolation type for blending
The animation plays back smoothly. Observe how the blending also takes into account the rotation of the aircraft so it meets up with the motion path smoothly.