Create a path animation using the Motion Path Manipulator tool


  1. Select the object you want to animate along a motion path curve.
  2. Draw the curve for the object.
  3. Select the object, -click the curve, and select Animate > Motion Paths > Attach to Motion Path > .

    The Attach to Motion Path Options window appears. See Animate > Motion Paths > Attach to Motion Path.

  4. Set the options. Ensure that the Follow option is on. See Follow.
  5. Do one of the following:
    • Click Attach to bind the current object to the selected curve with the current Attach Motion Path options.

    The Attach Motion Path Options window closes.

    • Click Apply to bind the current object to the selected curve with the current Attach Motion Path Options.

    The Attach Motion Path Options window remains open.

    • Click Close to disregard any changes made to the Attach Motion Path Options and close the window.
  6. Select the object only, and view the INPUTS section of the channel box.

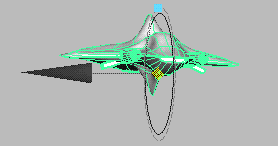
    Notice that one of the items listed is named motionPath1. This is the node that is controlling the path animation.

  7. Select this node in the Channel Box.

    Its attributes appear in the bottom part of the INPUTS section of the Channel Box.

  8. Select the Show Manip Tool from the Maya tool bar.

    A manipulator appears around the object.

  9. Use the Motion Path Manipulator in one of the following ways:
    • Use the handle in the center of the manipulator to position the object along its path.
    • Use the handle on the circle to control the front twist attribute of the path animation, that is, the amount it twists around its front axis. This latter handle can be used to manually set the banking of the object.
  10. The object is currently positioned at the start of the curve.Click in the time slider and move the time to that of the next motion path key.
  11. To move the object to the position of the next motion path key, click the light blue centre handle of the manipulator, and drag the object along the path.
  12. To set a key for this object at this position, set a key for the U Value attribute of the motionPath1 node.
  13. Set a key from either the Keys menu, or by clicking on the U Value attribute of the motionPath1 node in the Channel Box and selecting Channels > Key Selected.
  14. Repeat the last steps 11-13 until the object reaches the end of the curve.
  15. Click the Play button in the Playback Controls to view your path animation.
    Tip
    • You can avoid having to repeatedly set a key for the U Value attribute in the Channel Box if you turn Auto Key on.
    • You can use the same workflow if you want to animate the banking of the object by using the front twist handle of the manipulator.