A
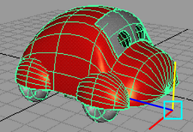
path animation can use a curve-on-surface as the path curve. The
workflow is identical to that when the curve is in world space;
however, there is extra flexibility in controlling the “up” orientation
of the object.
- Select
Create > NURBS Primitives > Plane.
A NURBS plane appears
in the scene view.
- Select
Modify > Transformation Tools > Proportional Modification Tool.
This tool is used to
introduce contours on the plane.
- Select
Modify > Make Live,
and then draw a curve on the plane.
- Select the object you want to animate
along the path, and
 -click
the curve-on-surface.
-click
the curve-on-surface.
The object and curve-on-surface
are now selected.
- Select
Animate > Motion Paths > Attach to Motion Path >
 .
.
The Attach
to Motion Path Options window appears. See
Animate > Motion Paths > Attach to Motion Path.
- Ensure that either Follow or Parametric
Length is on, and set the Up Direction to Normal so
that the object will stay normal to the surface.
- Do one of the following:
- Click Attach to
bind the current object to the selected curve-on-surface with the
current Attach Motion Path Options.
The Attach
Motion Path Options window closes.
- Click Apply to
bind the current object to the selected curve-on-surface with the
current Attach Motion Path Options.
The Attach
Motion Path Options window remains open.
- Click Close to
disregard any changes made to the Attach Motion Path Options and
close the window.
NoteYou may also wish
to turn on the Inverse Up option, depending
on the direction of the normals to the surface, and which side of
the surface you want your object to be animated along. If you don’t
know which side the surface’s normals point, you can always turn
the Inverse Up option of the motion
path on or off after the path animation is created.
- Click Play in the Playback Controls to
view your animation.
You can make the animation
even more complex by animating the CVs of the curve-on-surface or
by creating a lattice or cluster deformer on the surface and animating
this deformer object. The object animated by the path animation
will stay normal to the surface at all times.
NoteIf your surface was
made 'live', it will not appear shaded, even if
Smooth
Shade All is turned on. The surface must be made ‘unlive’
to appear shaded. See
Modify > Make Live.
To position an object on a path
- Select the object you want to move along
the path curve.
- Press the
 (Linux
and Windows) or
(Linux
and Windows) or  (Mac
OS X) key to select the rotate pivot of the current object.
(Mac
OS X) key to select the rotate pivot of the current object.
- Drag the rotate pivot and position it
on the object where you want it to attach to the motion path curve.
- Press the (Linux
and Windows) or (Mac
OS X) key again to exit from the rotate pivot selection and return
to object selection.
You can now attach your
object to a curve to create your path animation. See
Create a motion path using a curve.
NoteIf you forget to
position the rotate pivot on your object before creating your path
animation, you can always repeat these steps after the path animation
has been created.
The positioning may not
seem intuitive, however, as it will appear as if the object is moving
instead of the rotate pivot, as you move the rotate pivot. This
is because the motion path is continually recomputing and repositioning
the object so that the rotate pivot will stay on the path curve.