


Learning Resources > Tutorials > Getting Started with Maya > Painting > Lesson 2: Painting in 3D
using Paint Effects >
Brushes and strokes
Like a traditional paint program, Paint Effects allows you to use a brush and paint strokes. In Paint Effects, the brush and stroke have unique qualities and characteristics.
A brush contains the various attributes that define the appearance and behavior of the paint. The template brush settings define the initial settings for a brush.
When you drag the Paint Effects brush, you create a path for the brush called the paint stroke.
A stroke is a 3D curve (or collection of curves) with attributes that define how the paint is applied along the stroke path. You can paint strokes directly in the 3D scene or on objects.
When you select a brush preset from the shelf or from the Visor, that brush is copied to the template brush. Any changes you make to the template brush settings affect what the next stroke looks like, but they do not affect any previously painted strokes.
To select a Paint Effects preset brush from the Shelf

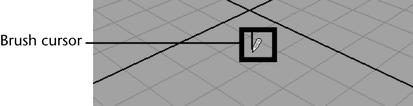
In the scene view, the cursor changes to a red circle with a vertical line indicating it is set to paint a stroke. The circle indicates the width of the brush path. With some types of strokes, this path will appear as the width of the actual paint; with other stroke types, it indicates the width of the tube seeding path, for example, plants, trees, etc.
The settings of the preset brush you select are copied to the template brush. The template brush settings are used when a paint stroke is drawn. If you want to modify the brush presets before you begin to paint, you must edit the template brush after you’ve chosen the preset brush ( Paint Effects > Template Brush Settings).
By default, the brush cursor moves along the ground plane. The ground plane lies in the X, Z dimension. This is the default behavior for the brush cursor. If you draw a paint stroke, it is applied to the ground plane (X, Z).
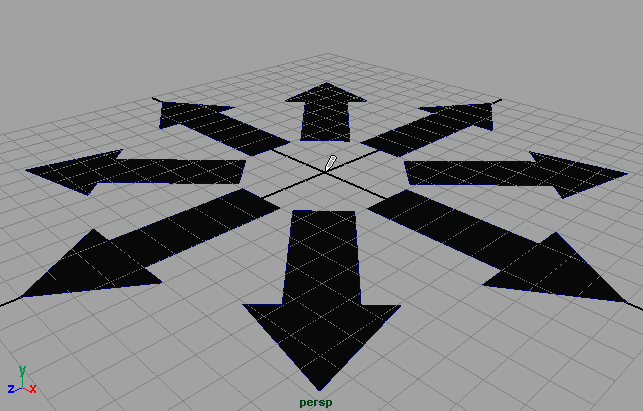
To paint 3D strokes in the scene view
One or more wireframe daisy stalks appear in the scene view along the path of the paint stroke. When you paint a stroke in the scene view it initially appears as a wireframe. Paint is not applied to the stroke until it is rendered.
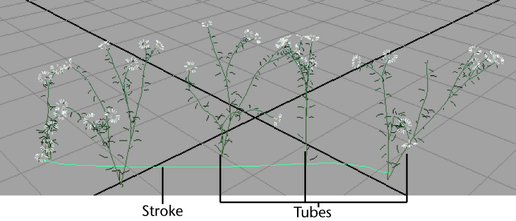
The stalks that extend out of the curve or stroke are called tubes. In Paint Effects, strokes are either simple strokes or strokes with tubes.
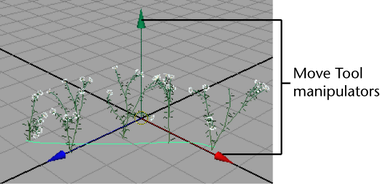
Because the stroke has a curve associated with it, you can move, scale, or rotate the stroke like other objects in the scene. You can edit the curve to modify the shape of the stroke path.
A move manipulator icon appears at the X, Y, Z origin. (If the move manipulator does not appear, you can click on the stroke to reselect it with the Move Tool.)
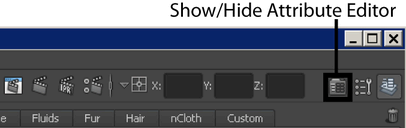
Each time you paint a stroke, Paint Effects creates a new brush and stroke node and attaches them to the stroke that is created. You can modify these brush and stroke nodes once they’ve been created. To edit these brush or stroke attributes, you use the Attribute Editor.
To modify the attributes of an existing paint stroke
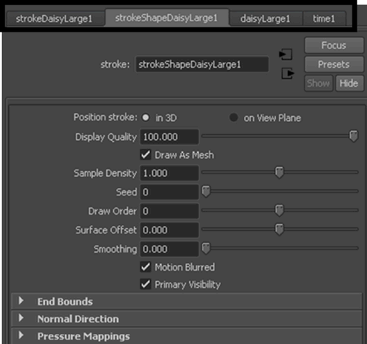
The Attribute Editor updates to display the nodes associated with the selected daisy stroke. The various attributes for the stroke appear under different tabs. Each tab represents a node associated with a specific set of attributes.
This tab contains information related to the transform node, because the most important attributes on this tab control the stroke’s curve transformation.
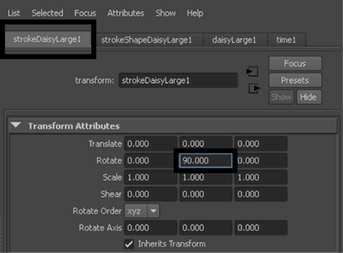
The stroke is rotated 90 degrees about the Y axis.

This tab is called the stroke attribute node because the attributes establish the paint stroke’s properties when the stroke is first created.

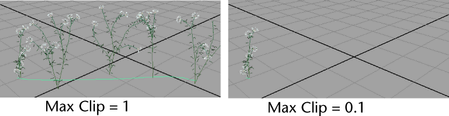
Min Clip specifies the start of the stroke along the path. Max Clip specifies the end of the stroke along the path.
Min and Max Clip can be animated to create the effect of the paint advancing along a path.
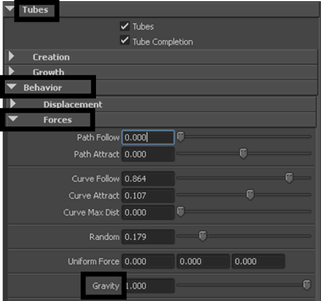
This is the node that contains attributes related to the paint brush associated with the stroke.
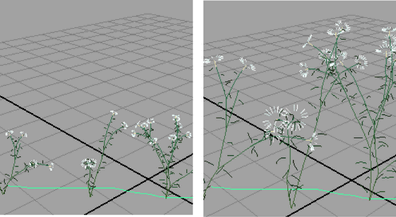
The daisies scale larger along the stroke’s path.
The daisies lay on the ground plane, as if wilting, with the increased gravity.
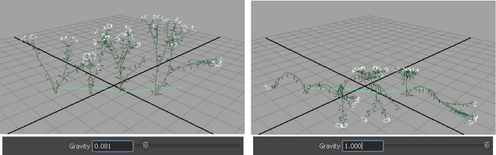
Drag the Gravity slider back to its original position approximately so that the stalks appear upright.
The last tab in the Attribute Editor is the time node. The time node is used for animation and dynamics. You do not use this node in this lesson.