


Learning Resources > Tutorials > Getting Started with Maya > Animation > Lesson 5: Inverse
kinematics >
Viewing hierarchies using
the Hypergraph
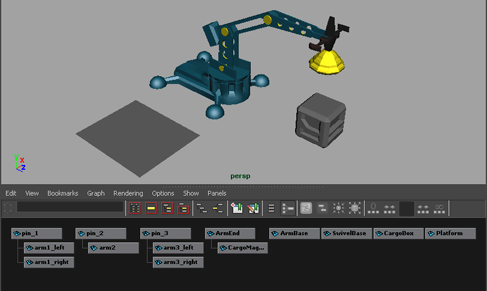
In the following steps, you use the Hypergraph to view the hierarchy for the mechanical arm. The Hypergraph is a scene management editor that presents a graphical view of the scene hierarchy. It allows you to more easily create, understand, and manage the hierarchy of objects and nodes in your scene.
To view hierarchies using the Hypergraph
The workspace displays two panels stacked on top of each other with an identical perspective view of the scene.
The lower panel displays the Hypergraph.
If the menu item appears dimmed, it indicates that the Hypergraph is already displaying the scene hierarchy
The Hypergraph displays with a black background by default. In order to see the relationships between the items, the background has been modified for the images in this lesson.
The boxes represent the nodes for the various items in the scene. Some items in the scene have already been parented into a hierarchy. This is indicated by the lines connecting some of the nodes. Selecting the nodes in the Hypergraph also selects the item in the scene view.
To select an item using the Hypergraph
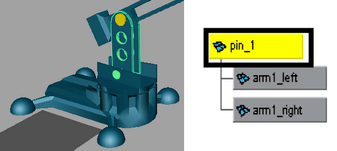
Hierarchies combine the various objects into discrete components for the mechanical arm, that is, the base, lower arm, middle arm, upper arm, and so on. If you select and rotate any of the parent nodes in the hierarchies, none of the other arm components follow because they are not combined into one unified hierarchy.