Example: Creating a template and a view


In this example, you will set up a template for car model assets, then create different views for the members of a team that will work with cars.

Set up the car asset

  1. Create an asset for the car. See Create assets.

    For the car model pictured, the asset encapsulates group nodes for the car body, interior, axles, lights, and doors.

  2. Rename the asset Car_AST.
  3. Publish the Translation and Rotation attributes from all of the nodes to the car asset, as well as the Rotate Channel that controls the spinning of the wheels. See Publish or unpublish attributes.

Create a template for the car asset

  1. Open the Asset Editor by selecting Assets > Asset Editor or Window > General Editors > Asset Editor.
  2. In the left panel of the Asset Editor, select the Car_CNT asset and click the Pin Asset icon .

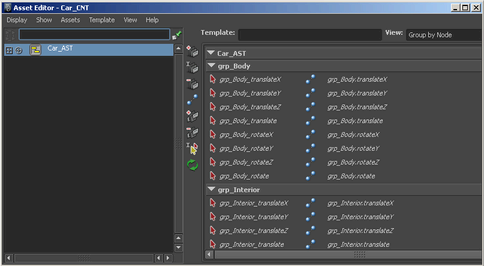
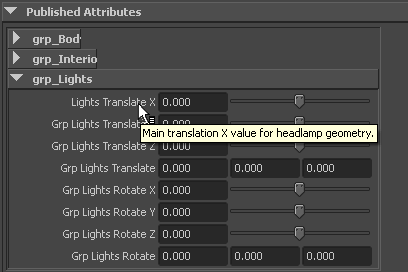
    The published attributes of the asset display in the right panel.

  3. Create a template for the car asset as follows:
    • From the Asset Editor menu bar, select Template > Save As.

      A file browser opens to the assets sub-directory of your current project.

    • Enter Vehicle in the File name field, and click Save.

      The template is saved in the assets sub-directory and the template name now displays at the top of the Asset Editor.

  4. (Optional) Open the XML template file you have just created using the XML editor of your choice.

    The default template lists all of the published attributes in a flat list. In the next steps, you’ll add views and make other edits to this template file to help organize your asset.

  5. (Optional) Close the XML template file before continuing.

Create a template view

  1. In the left panel of the Asset Editor, select the car asset and click the Pin Asset icon (if it is not already pinned).
  2. In the Asset Editor menu bar, select View > Add > .

    The Add View Options appear.

  3. In the Add View Options, keep the default options turned on and enter Modeler as the view Name. Click Apply and Close when finished. (See also Add a view to an asset template.)

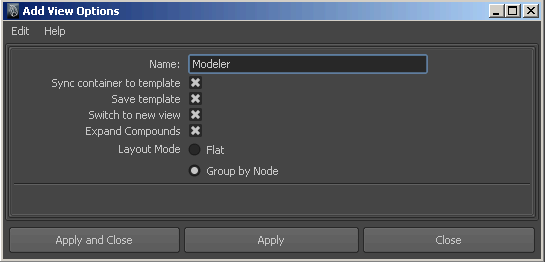
    The template switches to use the new view in the right panel of the Asset Editor. The new view is also active in the Attribute Editor.

    The asset’s attributes are currently organized using the default Group By Node layout. Each group of attributes displays under a heading based on its parent node name.

    In the next steps, you will customize the Modeler view.

Customize the view of attributes

  1. Open the XML editor of your choice, and navigate to open the XML Vehicle template file.
  2. Search the XML file for the word Modeler to locate the section of the template file where the Modeler view is defined. (See Parts of an asset.)

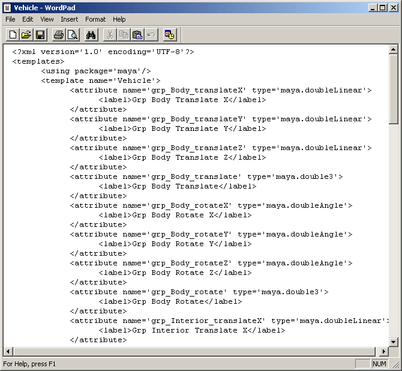
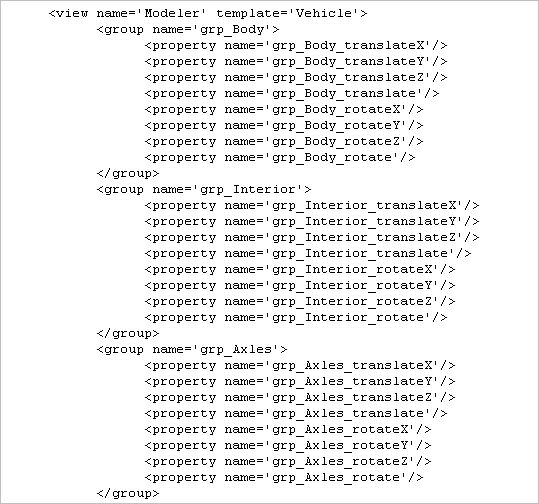
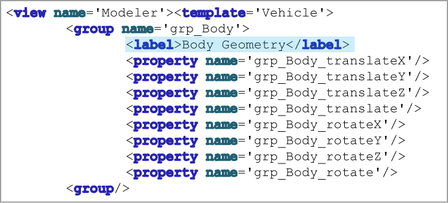
    Because the Group By Node option was turned on when you created the Modeler view, all the attributes in the XML file are grouped under “group name” headings.

    In the view definition, each published attribute is represented by a property element. The property elements correspond to the published attributes by name.

  3. Customize the view until it is set up for the modeling artist on your team. (See Customize a template view.) For example, you might do the following:
    • For each group element, add <label> elements to change the display name for the group in the Attribute Editor.

    • For each property element, add <label> elements to change the display name of the attribute in this view only.
      TipWhen adding elements within a property definition, ensure you delete the existing trailing slash / from the property element and add a closing </property> tag.

    • Add <description> elements to each property definition to create tooltip help.

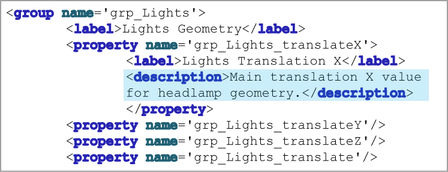
      The description text will appear over each attribute when an asset user hovers the mouse pointer over them in the Attribute Editor.

    All of these changes let you completely customize the interface your modeling artist will use when they work with car assets.

  4. When you are finished changing the Modeler view, save the XML template file and close your XML editor.
  5. Return to Maya and select Template > Reload in the Asset Editor to reload the template. (See also Reload an asset template.)

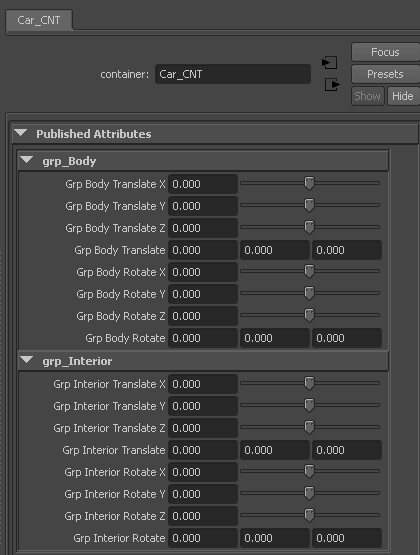
    The published attributes in the right panel update to reflect the changes you made. The changes are also reflected in other editors, such as the Attribute Editor.

Assign the Vehicle Template to another car model

Now that you have set up the Vehicle template you can use it to help you create other car assets. Using the same published attribute names for all of your car assets can help you verify that all car models have the required attributes, and it also lets you assign the same customized views to all of your car assets.

  1. Load the second car model and create an asset for it. See Create assets.
  2. Rename the new asset LowPolyCar_AST.
  3. Assign the Vehicle template to the second car by doing the following:
    • Open the Asset Editor, select the LowPolyCar_AST in the left panel, and click the Pin Asset icon .
    • Select Template > Assign > Assign New Template in the Asset Editor menu bar.
    • In the template file browser that appears, select your Vehicle template file and click Select. (See also Assign a template to an asset.)

      The Vehicle template is assigned to the LowPolyCar_AST asset. The list of published names from the template file now displays in the right panel under the Unbound heading.

  4. Expand the Unbound heading in the right panel to view the list of published names from the template.

    Now that you have loaded the published attribute names required for a car model from the template, you can start to bind the LowPolyCar_AST asset attributes to those published names.

  5. Start to bind attributes from the LowPolyCar_AST to the published names of the template by doing the following:
    • In the left panel of the Asset Editor, select an attribute from the LowPolyCar_AST.
    • In the right panel, find the published name you want to use for that attribute, and click the Bind icon .

    The attribute you selected in the left panel is now published to the LowPolyCar_AST asset with the published name you selected from the right panel. The Bind icon changes to the Unbind icon , indicating the published name is now bound to an attribute. When you click to refresh the Asset Editor, the bound attribute moves to display above the Unbound list.

    (See also Bind/unbind an attribute or node.)

  6. Continue selecting attributes in the left panel and publishing/binding them with names from the template until you have all of the required attributes for car models published to the LowPolyCar_AST.