Changing the behavior of a fluid


By modifying the attributes of the fluid container you affect the appearance and behavior of the fluid. Note that no matter what changes you make to the attributes, the fluid can never leave the container.

In the next steps you’ll look at some of the attributes of the fluid container to gain some understanding into dynamic fluid effects.

To modify attributes for the fluid

  1. Select the fluid container.
  2. Show the Attribute Editor in the right panel of the Maya window, and click the fluidShape tab.
  3. Look in the Contents Method section. The Contents Method defines how a fluid property is defined in the container, if at all.

    Notice that Density and Velocity are set to Dynamic Grid.

    The Dynamic Grid setting divides the container into virtual rectangular units called voxels (volume pixels). You place the values in this virtual grid by emitting them, painting them, or adding a predefined initial state. At each step of the simulation, Maya recalculates the values in each voxel using the fluid dynamics solver. This is what creates the dynamic motion of the fluid.

    TipYou can display Density values for the virtual grid by changing Numeric Display to Density in the Display section of the fluid Attribute Editor. Set the shading mode to Wireframe.

    For dynamic fluid simulations, Density must be set to Dynamic Grid. Also, Velocity cannot be turned Off because velocity moves the property values around inside the grid.

    You look at defining properties as Gradient and Static Grid in the next lessons.

  4. Make the density fall instead of rise by opening the Dynamic Simulation section of the Attribute Editor and setting the following:
    • Change the Gravity value to -9.8. (Acceleration due to gravity is -9.8 m/s2 in the physical world.)

    Negative values move the Density down.

  5. Play the simulation using the playback controls at the bottom of the Maya window.

  6. To add turbulence to the container and give the Density a whirling circular motion.
    • Ensure the fluid container is selected if it is not already.
    • In the Attribute Editor, open the Contents Details section, and then open the Turbulence section.
    • Change the Strength value to 1.0.
  7. Play the simulation using the playback controls at the bottom of the Maya window.

  8. Stop the playback and go to the start of the playback range.
  9. Change the effect of the container boundaries on the fluid:
    • In the Container Properties section at the top of the Attribute Editor, set the following options:
    • Boundary X: None
    • Boundary Y: None
  10. Play the simulation using the playback controls at the bottom of the Maya window.

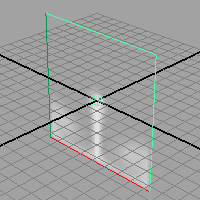
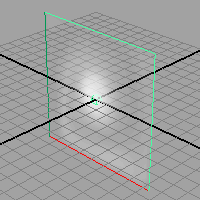
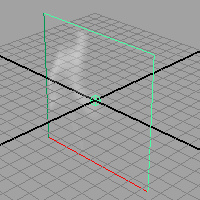
    Notice that the fluid no longer collides with the sides of the container—it appears to pass through the sides. The fluid behaves as though the container boundaries don’t exist. Note that even though the fluid appears to pass through the container boundaries, it does not exist outside the boundary. Fluids can only exist inside containers.

  11. Change Boundary X and Boundary Y back to Both Sides to restore the boundaries at all sides of the container.
  12. Stop the playback and go to the start of the playback range.