


Learning Resources > Tutorials > Getting Started with Maya > Character Setup > Lesson 3: Cluster and blend
shape deformers >
Editing cluster weights
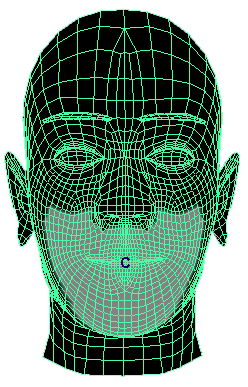
In this section you will use the Paint Cluster Weights Tool to further refine the smilingFace. As you saw in previous steps, the points in a cluster move when you move the cluster handle. The distance a particular point moves depends on its weight. Lower weights cause less movement, while higher weights cause exaggerated movement. In the next steps, you create a smile by editing the weights.
To edit cluster weights using the Paint Cluster Weights Tool
 . This
displays the smilingFace in grayscale.
. This
displays the smilingFace in grayscale.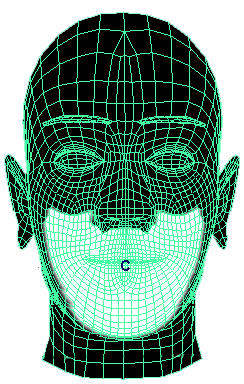
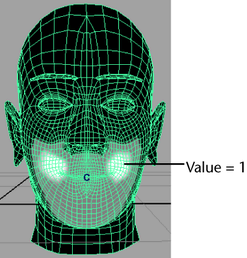
The white area shows the points that make up the cluster. The whiteness also indicates the weights—how much the points move in response to the movement of the cluster handle. White indicates a cluster weight of 1—the points move the same distance as the handle. By default, each point has a weight of 1.
Black indicates a cluster weight of 0. The points do not move in response to cluster handle movement. Note that regions that are not part of the cluster are also black.
Although there are no gray regions currently, gray means the movement is partial. The lighter the gray, the more the movement. Gray regions indicate a cluster weight between 0 and 1.
This gives all the cluster points a weight of 0.5. The white region is now gray:
The selected vertices move down a bit, as the weight of 0.5 lessens the effect of the prior movement of the cluster by 50%.
again.
A Radius(U) of 0.1 sets the radius of the region affected by the stroke. The red circle icon on the face displays the radius.
An Opacity of 0.3 scales down the effect of painting weight values so you can build up values gradually with repeated strokes.
A Replace operation paints the Value specified on the points stroked.
While painting weights, it’s useful to intermittently check the shape with with full-color shading rather than with the grayscale shading. To do this, click the Select Tool to turn off the Paint Cluster Weights Tool. (You might also prefer to cancel the selection of smilingFace to eliminate the display of the highlighted wireframe.)
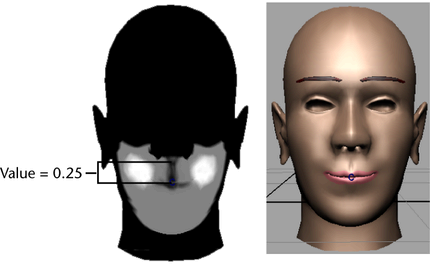
Because the corners of the mouth have a high weight and the central region around the lips have a low weight, the corners move up more in response to the prior positioning of the cluster handle. This creates a smiling mouth. The cheeks and chin have a medium weight, so they also move up slightly also. (For many people, skin at the chin and neck moves during smiling.)
Your smilingFace should now have a slight smile as a result of your cluster weight edits.