Window > General Editors
> Visor
In scene view: Panels
> Panel > Visor
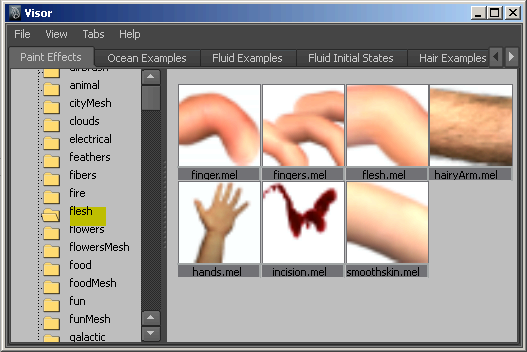
The Visor displays
textures, images, and shading nodes in the project directory.
Visor tabs
contain a collection of items in the scene, or directories and files on
disk. You can customize the way you view files, and create and customize tabs.
You can also  -drag
items from the Visor into Hypershade to create a new node, or onto
a swatch in Hypershade to connect nodes.
-drag
items from the Visor into Hypershade to create a new node, or onto
a swatch in Hypershade to connect nodes.
To view an image
- Double-click an image file in the images
directory to view the image in fcheck.
To create a new tab
- Select Tabs > Create New
Tab.
- Enter a new tab name.
- Select a Tab Type and
specify the corresponding options.
- Click Create.
- Scene
-
Displays a collection
of nodes in the current scene.
- Disk
-
Displays files on disk,
such as a texture library.
- Paint Effects
-
Displays Paint
Effects files, such as brush settings.
- Show Nodes Which Are
-
For Scene tabs,
select to display only certain nodes types within a specified tab.
- Root Directory
-
For Disk and Paint
Effects tabs, either type the path name if you know it,
or click the folder icon to browse through directories to select
the directory where the items are stored.
- Only Show Files (Hide Directory
Tree)
-
For Disk and Paint
Effects tabs, turn this on or off to hide or show the
directory tree. This is especially helpful if you find you routinely
work with files located in one specific directory. You can switch
between viewing directory folders or just the files within that
directory.
Menus
File menu
- Import
-
Opens the Import dialog
box so you can select a Maya scene file (such as a file containing
a shader) to import into Maya.
- Import Selected Scene Files
-
Reads information from
another file and loads it into the current file.
- Import Selected Image Files
-
Select an item from the
pull-out menu to select how to import image files. Include Placement
is on by default.
- As Normal
-
For normal textures,
Maya applies a texture map according to the geometry characteristics—textures
are placed onto polygons based on UV information or placed onto
NURBS surfaces based on parametrized information.
- As Projection
-
To create projection
textures, Maya applies a texture map to the surface of a 3D object
by projecting a 2D texture into 3D space—in other words,
Maya projects the texture maps independently of the geometry characteristics.
TipFor textures created
with As Projection turned on, you need to explicitly connect the
texture to the bump so the texture is visible in the bump map.
- As Stencil
-
Lets you place an image
file or texture on a surface and manipulate its placement and size
to look like a label. You can use masking techniques to hide unwanted
parts of the image.
- Include Placement
-
When on, Maya automatically
creates a texture placement node when you create a texture render
node. The default setting is on.
- Export Selected Network
-
Exports the selected
item into a new file. The file browser opens to its best guess directory,
but can browse to any directory, or cancel, before exporting.
View menu
- Frame Selected
-
Frames only the selected
nodes in the current Visor layout.
- Frame All
-
Frames all the nodes
displayed in the current Visor layout.
Tabs menu
Each tab contains the
nodes that make up the current scene. These options let you create
new tabs and customize the default tabs.
- Create New Tab
-
You can create and name
tabs to help you organize a scene’s rendering elements.
- Move Tab Left/Right
-
Select a tab then select
one of these options to re-arrange the tabs.
- Rename Tab
-
Select a tab then select
this option to rename it.
- Remove Tab
-
Select a tab then select
this option to remove it.
- Revert to Default Tabs
-
Removes new tabs and
reverts to the default organization.
- Current Tab Options
-
Select a tab, then select
one of these options to control the display: Show
Directories Only, Show Files Only, Show
Both, Refresh File Listing.