Learning Resources > Tutorials > Getting Started with Maya > Fur > Lesson 1: Assigning a fur description >
Painting fur attributes
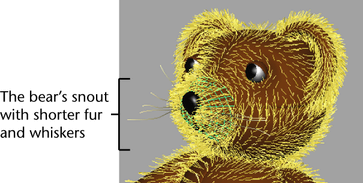
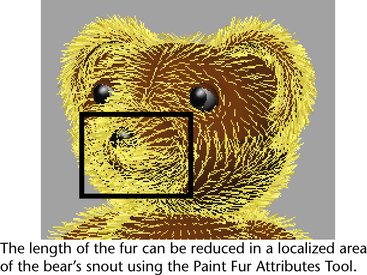
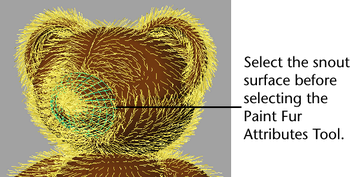
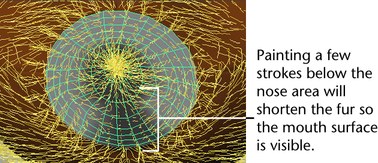
The fur feedback on the bear’s snout appears too long in the region of the bear’s mouth and nose. The fur will poke through the nose and hide the mouth in the final rendered image unless you shorten the fur in that region on the snout. You can reduce the length of fur in a localized area of a surface using the Paint Fur Attributes Tool.
Using the Paint Fur Attributes Tool you can paint virtually any fur attribute. In this lesson you use the Paint Fur Attributes Tool to:
The Paint Fur Attributes Tool does all of the above via attribute maps that you create by painting directly on the surface. The attribute map modifies the associated fur attributes you have selected for modification based on the regions of black, white, or gray that you paint in the map.
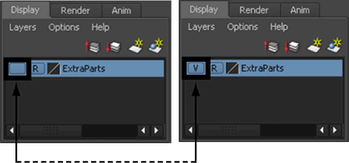
Before you begin painting an attribute map you’ll want to hide the nose and mouth surfaces. Earlier in the lesson you assigned the nose and mouth surfaces to the ExtraParts reference layer to prevent them from being accidentally selected in the scene view. To hide these objects you can set the referenced display layer to invisible.
To hide the referenced display layer
To shorten the fur using the Paint Fur Attributes Tool
 .
.
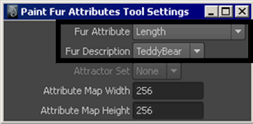
The cursor updates to display as a paint brush indicating that the Paint Fur Attribute Tool is active. The Paint Fur Attributes Tool Settings window and the Paint Tool Settings editor appears. These windows let you set and control which attributes get painted for an attribute map.
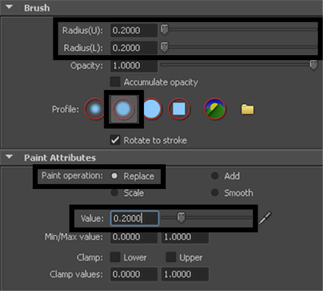
These settings set the brush to paint a relatively small, soft edged region, with each stroke of the tool as you replace the existing fur with shorter fur.
Wherever you paint, the fur feedback updates and becomes shorter in length.
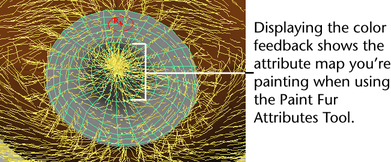
The snout surface updates to display the fur length attribute map you are currently painting. The black region at the end of the snout indicates the area you have just painted. This region of the attribute map indicates where the fur will be shorter in length when it is rendered. The lighter gray region indicates where you have not yet painted and where the fur length will remain unaffected.
You also want the fur to be short in the region of the bear’s mouth as well.
Notice that the attribute map has a gradual color falloff. This ensures that the fur transition between the original attribute values and the map does not appear abrupt. You can smooth the attribute map even further by applying a smooth operation.
To create whiskers using the Paint Fur Attributes Tool

A second fur description is assigned to the bear’s snout. The snout appears cluttered at this point but you’ll rectify it in the following steps.
.
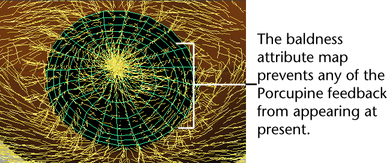
This creates a baldness attribute map for the Porcupine fur description that is black in color making the Porcupine fur feedback disappear temporarily.
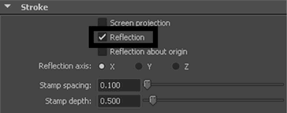
These settings set the brush to paint a relatively small, soft edged stroke, that is gray in color on the baldness map so that some of the porcupine fur (that is, whiskers) appear. When reflection is turned on, the stroke you make on one half of the surface is mirrored on the opposite half. This lets you create identical whiskers on either half of the snout.
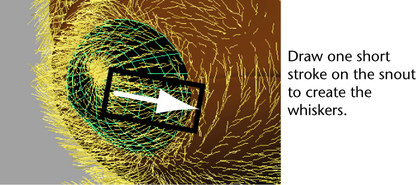
The fur feedback updates immediately after your stroke to show the whiskers on both sides of the snout. Tumble the scene view if they are not immediately apparent.
The whiskers are not pointing outwards at the correct angle. To rectify this you need to modify the Polar attribute on the Porcupine fur description.
The Attribute Editor appears and displays the attributes for the Porcupine fur description.
The whiskers update to point outwards on either side of the snout and appear shorter as a result.