As you work on an animation, you will want to preview the playback at a speed close to final production speed. To save time while previewing, you need to balance the quality of graphics with playback performance. You can also turn on display options, such as ghosting and motion trail, to help you visualize the flow of a character’s motion.
Ideally, you should be able to click the Play forwards button and your animation would play back full-screen, fully shaded, and in real-time without dropping any frames. Although this is possible with smaller animations, the more complex a scene is, the more computations required before displaying each frame. For tips that can improve playback performance, see Optimize your scene for playback.
You can customize that playback of your animation by setting the Time Slider, Playback, Animation, and Sound preferences. To edit these options, go to the Playback options in Window > Settings/Preferences > Preferences. See Edit animation preferences.
Ghosting simulates a technique in classical animation where an animator rapidly flips through a handful of cell drawings to get a feel for the timing of the action he is working on. You can use ghosting to sketch out and visualize the flow of a character’s motion through an animation, and to solve problems with the timing of the motion.
Using the Ghosting feature in Maya, you display an animated object for specified frames before and after the current frame. Ghosts refer to character images displayed at a time other than the current one. Ghosting can be controlled locally on each object in your scene, and you can ghost entire skeletons, object hierarchies, or specific parts of an object. See Animate > Ghost Selected.
You can control how ghosts look in the scene view. You can set the color of ghosts and the number that is displayed. See Ghost an object for more information.
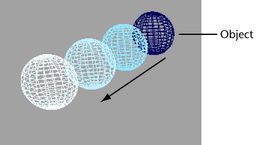
Also, the color of ghosts before and after the current frame/keyframe automatically lighten according to their distance from the current frame/keyframe.
This is visible only when scene view Shading is set to Wireframe. See the following examples.
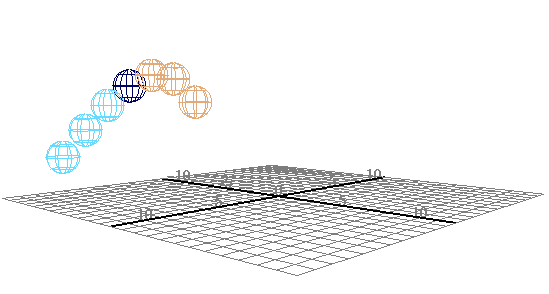
In the example below, the sphere’s Type of Ghosting is Custom Frame Steps. The sphere’s ghost options are set to the following: Steps before Current Frame is set to 3, Steps after Current Frame is 0, and the Step Size is 3.
Ghosts lighten as their distance from the object increases.
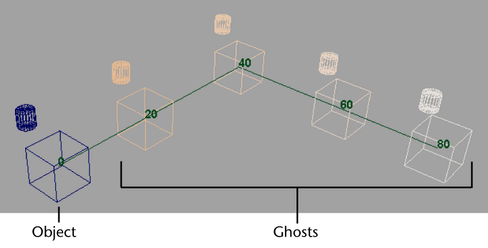
In the next example, the cube’s Type of Ghosting is Custom Frames. The cube’s ghost options are set to the following: frame numbers 20, 40, 60, and 80 are present in the Frames to Display field and Hierarchy is on. The cylinder is the child of the cube.
The cube also has a Motion Trail with frame numbers.
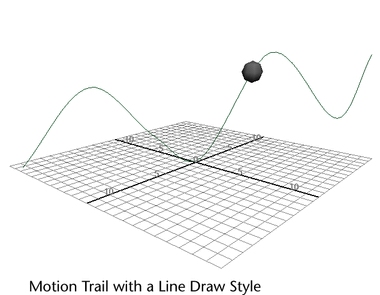
With Motion Trail, you can display the trajectory of an object. Motion Trails works with objects that are animated by keyframe animation, deformers, motion capture, and expressions. You can create the motion trail before you animate an object or after. See Apply Motion Trails to an object and Animate > Create Motion Trail.
You can also playblast to preview you the animation in your scene. See Playblast.


