|
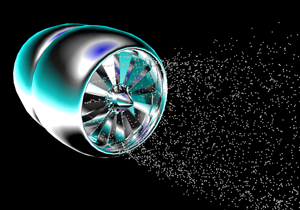
Multi-render passes for mental ray for Maya The new multi-render pass feature provides an easy workflow for configuring render passes. You can render an unlimited number of render passes, and you can group them into render pass sets. You can also select a subset of the objects or lights in your scene to contribute to each render pass. This subset is called a render pass contribution map. Using the multi-render pass feature, you can reduce the need to use render layers, thus reducing compute times for scene translation and actual rendering. If you work with complex multi-layered compositions, rendering may also be several times faster. Multi-render passes also allow you perform scene segmentation at render time. |
|
Setting up your scene to use multi-render passes is simple.
For advanced users, you can also:
|
|
|
Refer to the following sections for more information:
Refer to the following sections for workflow examples:
|
|
|
mental ray Render Settings re-organization The mental ray tab in the Render Settings window is now divided into 5 mental ray tabs, including: Passes, Features, Quality, Indirect Lighting, and Options, providing better organization for the mental ray controls. For example, if you need to tweak your final gather settings, you can simply go to the Indirect Lighting tab. |
|
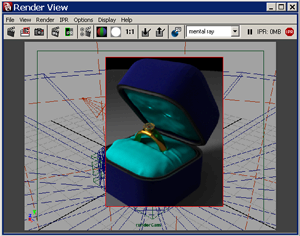
IPR improvements for mental ray for Maya This section lists the IPR improvements for mental ray for Maya: Light manipulation improvements for mental ray include:
|
|
Object manipulation improvements for mental ray include:
|
|
|
Options improvements for mental ray include:
You can also set IPR specific options such as
the verbosity level for error messages by selecting
Render > IPR Render Current Frame > |
|
|
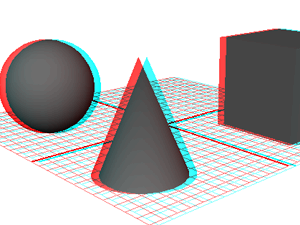
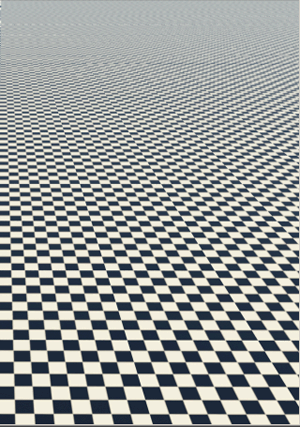
You can now add a stereoscopic camera to your scene. This allows you to create depth of field with the illusion of a three dimensional interface. Choose between various stereo modes such as anaglyph, checkerboard and horizontal interlace. You can render from the stereo camera and view the render output in any of these stereo modes. For advanced users, you can also customize your stereoscopic camera by adding a custom stereo rig to your scene. |
|
Use elliptical filtering to perform high quality texture filtering and anti-aliasing when rendering with mental ray for Maya. Instead of using point sampling, elliptical filtering uses an area (an ellipse) to perform an image lookup. This ellipse contains many pixels, and the pixels are averaged and the average color is returned as a result. Elliptical filtering in Maya is very simple to use. You can access its controls through the Attribute Editor of your file node. |
|
Use render proxies with mental ray rendering to manage large scenes with complex geometry. Export your complex object as a mental ray assembly file, then replace it in your scene with a placeholder object that references this file. When you render, the exported object is loaded into memory and rendered with the rest of your scene. Translation time and memory usage are cut down, allowing mental ray for Maya to render large scenes. |
|
Previously, you could preview a smooth polygon mesh in the scene view by pressing 3. Now you can also render the smooth preview in mental ray for Maya. You can choose to use the same level of smoothing for the 3D viewport preview as for your render. Alternatively, you can also use a different division level for the two. |
|
new mental ray Render Settings attributes
new mental ray 3.6 and 3.7 attributes have been added to the Render Settings, including: Importons, Irradiance Particles, Ambient Occlusion and Merge Distance for photons, caustics, and global illumination.
A Render Mode attribute has been added that allows you to render only final gather, or shadow maps, or light maps. In addition, flags that enable you to globally disable light maps and lens shaders have been added. The new BSP2 acceleration method is also available.
Final gathering now accepts multiple final gather map files. New rasterizer controls include: Rasterizer Transparency, Rasterizer Pixel Samples, and Rasterizer use Opacity. New motion blur controls include: Displace Motion Factor and Force Motion Vector Computation.
Render Settings window: Common tab re-organization
The Common tab in the Render Settings window has been re-organized so that there is a clear distinction between the frame and file attributes.
The Frame Buffer Naming and Custom Naming String attributes have been added so that if you are using the OpenEXR file format with the multi-render pass feature, you can customize the naming of the channels in your OpenEXR file.
Texture baking using multiple threads
You can use the Bake Optimization feature to select between baking using one thread per object or baking using multiple threads per object. The former performs better for baking multiple objects and the latter for baking a single complex piece of geometry.


 in the
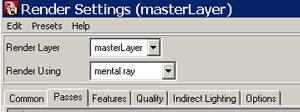
 .
.