Volume Fog provides a fog effect in which the fog density is not constant through 3D space. This plug-in provides effects such as puffy, cloudy fog that appears to drift and break up in the wind.
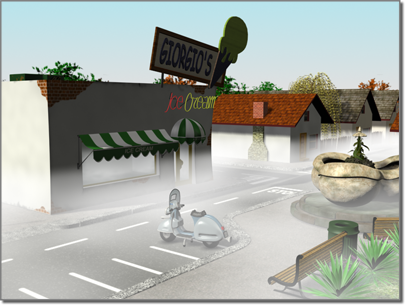
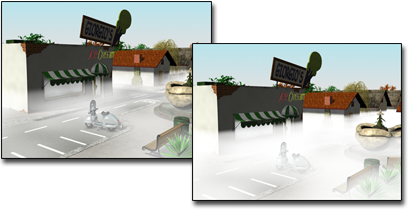
Volume fog added to a scene
Volume Fog renders only in Camera or Perspective views. Orthographic or User views don’t render Volume Fog effects.
 Environment.
You create Gizmos in much the same way as their matching geometry types. Drag the mouse to create the initial dimensions. The Sphere gizmo has an additional Hemisphere check box that turns the sphere into a hemisphere.
In addition, each gizmo has a Seed spinner and a New Seed button. Different seed values generate different patterns. Clicking the New Seed button randomly generates a new seed value for you.
To assign volume fog to a gizmo from an apparatus modify panel:
 Modify panel of an apparatus.
To assign a gizmo to volume fog from the Environment panel:
The name of the gizmo appears in the list field at right.
When you render, the volume fog will be confined to the shape of the gizmo.
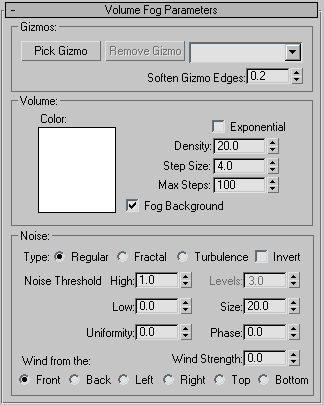
The Volume Fog Parameters rollout appears when you select Volume Fog under Effects in the Environment dialog. The Volume Fog Parameters rollout has the following controls.
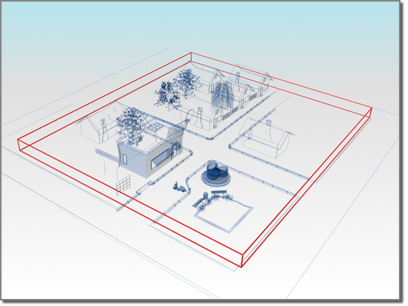
By default, volume fog fills the entire scene. However, you can choose a gizmo (an atmospheric apparatus) to contain the fog. The gizmo can be a sphere, a box, a cylinder, or some combination of these.
Click to enter Pick mode and click an atmospheric apparatus in the scene. The apparatus contains the volume fog when you render. The name of the apparatus is added to the apparatus list.
Multiple apparatus objects can display the same fog effect.
You can pick multiple gizmos. Click Pick Gizmo and then press H. This opens the Pick Object dialog, which lets you choose multiple objects from a list.
Changing the dimensions of a gizmo changes the region that fog affects, but doesn't change the scale of the fog and its noise. For example, reducing the radius of a spherical gizmo crops the fog, and moving the gizmo changes the fog's appearance.
Sets the color for the fog. Click the color swatch, and then select the color you want in the Color Selector.
You can animate the color effect by changing the fog color at a nonzero frame with Auto Key on.
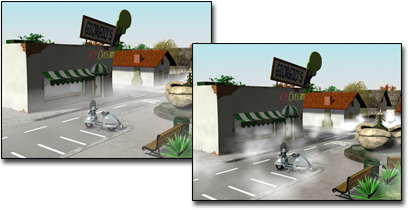
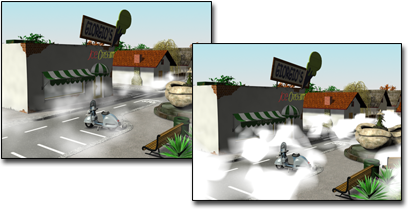
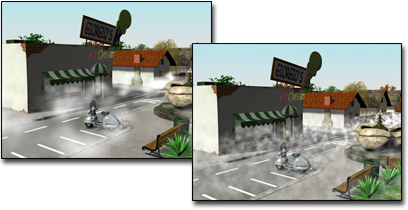
Left: Original scene
Right: Noise added to the fog
Noise options for volume fog are comparable to the noise options for materials.
Limits the noise effect. Range=0 to 1.0. When the noise value is above the Low threshold and below the High threshold, the dynamic range stretches to fill 0-1. This makes for a smaller discontinuity (First order instead of 0 order) at the threshold transition, and thus produces less potential aliasing.
Ranges from -1 to 1 and acts like a high-pass filter. The smaller the value, the more transparent the volume is with discrete blobs of smoke. Around -0.3 or so your image begins to look like specks of dust. Because the fog becomes thinner as this parameter gets smaller, you'll probably need to increase the density or the volume will start to disappear.
Controls the speed of the wind. If you have Wind Strength also set to greater than 0, the fog volume animates in accordance with the wind direction. With no Wind Strength, the fog churns in place. Because there's an animation track for phase, you can use the Function Curve editor to define precisely how you want your wind "gusts" to occur.