You can use a bitmap file or procedural map in the Opacity material component to make an object partially transparent. Lighter (higher-value) areas of the map render as opaque; darker areas render as transparent; and values in between are semi-transparent.
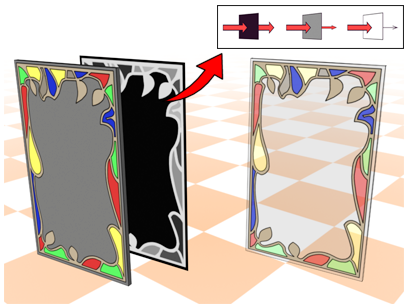
The gray levels of an opacity map determine the amount of opacity.
Setting the opacity map's Amount to 100 applies all of the map. Transparent areas are fully transparent. Setting the Amount to 0 is the equivalent of turning the map off. Intermediate Amount values are blended with the original Opacity value. Transparent areas of the map become more opaque.
3ds Max opens the Material/Map Browser.
(If you choose Bitmap as the map type, 3ds Max opens a file dialog that lets you choose the image file.)
Alternatively, you can use the  Slate Material Editor to wire a map node to the Opacity component.


 Material Editor