You can choose different views to display in these four viewports as well as different layouts from the viewport label menus.
You can choose from other layouts different from the default configuration. To choose a different layout, click or right-click the General viewport label ([+]), and from the General viewport label menu, choose Configure. Click the Layout tab of the Viewport Configuration dialog to see and choose the alternative layouts.
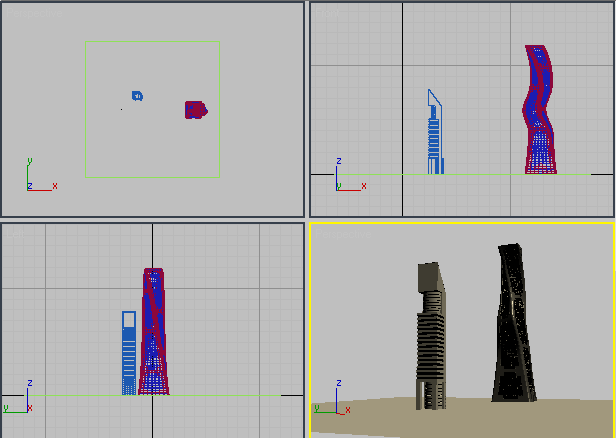
Typical viewport layout
When four viewports are visible, one viewport, marked with a highlighted border, is always active. This is where commands and other actions take effect. Only one viewport at a time can be active. Other viewports are for observation only; unless disabled, they simultaneously track actions taken in the active viewport. When Auto Key or Set Key is on, the active viewport border changes to red.
In general, a viewport becomes active as you work in it. You can move an object in one viewport, and then drag the same object in another viewport to continue the move. To activate a viewport without changing the selection, right-click it. If you left-click a viewport, the viewport is activated and whatever you click is selected, or, if you click an empty area, everything is deselected. You can restore previous selections with Undo.
Viewports are labeled in the upper-left corner. You can control many aspects of a viewport by using the viewport label menus.
You can resize the four viewports so they are of unequal proportions. To do so, drag the intersection of two, three, or four viewports, on the splitter bars. To return to the original layout, right-click an intersection of the dividing lines and choose Reset Layout from the right-click menu.
The new viewport proportions are saved in the scene. However, changing the viewport layout always resets them.

The three-color world-space tripod is visible in the lower-left corner of each viewport. The colors correspond to the three axes of world space: red=X, green=Y, and blue=Z. The axes are labeled in these same colors. The tripod always refers to world space, regardless of the current reference coordinate system.
The world-space tripod is on by default. To turn off this feature, see “To turn off the world-space tripod in all viewports” in the following procedures.
Viewport Tooltips for Object Names
When you’re working with objects in a viewport and pause the cursor over any unselected object, a tooltip appears with the name of that object. If you need to select something or link to something, wait until you see the tooltip to be sure you have selected the object you want. These tooltips are disabled when you work in sub-object mode.
Tooltips are on by default. To turn off this feature, see To turn off object name tooltips, below. For more information see Viewport Navigation and The 3ds Max Window.
To make a viewport active, do one of the following:
If you click an object in the viewport, it is selected. If you click a space where there are no objects, any selected objects are deselected.
Right-click activates a viewport without changing the selection state of objects. (You can also do this by left-clicking the viewport label.)
To switch between single and multiple viewports:
Activate the viewport you want to minimize or maximize, and do one of the following:
 (Maximize Viewport Toggle) in the lower-right corner of the 3ds Max window.
If you don't drag a corner, you can move the borders horizontally or vertically only.
To change the number of viewports and their arrangement:
To turn off the world-space tripod in all viewports:
 Preferences to display the Preferences dialog.
To turn off object-name tooltips:
Preferences to display the Preferences dialog.
In the upper-left corner of each viewport is a label bar that consists of three labels. Each label is a clickable shortcut menu to control viewport display.
At the right end of the status bar are the buttons that control the display and navigation of the viewports.


