


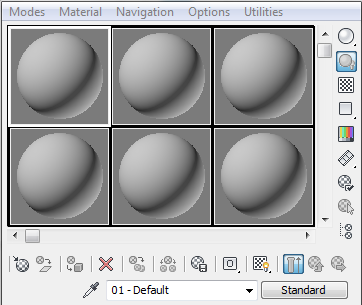
Above the Material Editor sample slots is the menu bar. Below and to the right of the sample slots are buttons and other controls that you use to manage and change maps and materials.
Material Editor tools below and to the right of the sample slots
Reflectance and Transmittance Display
Buttons below the sample slots (the "toolbar")
 Reset Map/Mtl to Default Settings
 Show Shaded/Realistic Material in Viewport
Buttons to the right of the sample slots
 Make Preview, Play Preview, Save Preview
 Pick Material From Object (Eyedropper)
Name Field (Materials and Maps)
Type Button (Materials and Maps)
To use the Material Editor Options dialog:
 (Options) to the right of the sample slots.
The new shape is displayed in the sample slot, with the material mapped to it.
The flyout gives you three options: sphere (the default), cylinder, or box. An additional custom object option is available if you define a custom object as described in Creating a Custom Sample Object .
The Material Editor menu bar appears at the top of the Material Editor window. It provides another way to invoke the various Material Editor tools.
These fields show the reflectance and transmittance of the active material. Both the average value and the maximum value are shown.
The Sample Type flyout lets you choose which geometry to display in the active sample slot.
Turning on Backlight adds a backlight to the active sample slot. This button is on by default.
Turning on Background adds a multicolored checkered background to the active sample slot. The pattern background is helpful when you want to see effects of opacity and transparency.
The buttons on the Sample UV Tiling flyout adjust the repetition of the map pattern on the sample object in the active sample slot.
Video Color Check checks the material on the sample object for colors that are beyond the safe NTSC or PAL threshold.
You can use animated maps to add movement to a scene. For example, to simulate a sky view, you could map an animation of moving clouds to a clerestory window. The Make Preview options let you experiment with the effect in the Material Editor before you apply it to your scene.
This button displays the Material Editor Options dialog to let help you control how materials and maps are displayed in the sample slots.
Select By Material allows you to select objects based on the active material in the Material Editor. This command is unavailable unless the active sample slot contains a material used in the scene.
The Material/Map Navigator is a modeless dialog that provides quick navigation through the hierarchy of maps in a material, or of sub-materials in a compound material.
Get Material displays the Material/Map Browser to allow you to choose a material or map.
Put Material To Scene updates a material in the scene after you edit the material.
Assign Material to Selection applies the material in the active sample slot to the currently selected object or objects in the scene. At the same time, the sample slot becomes hot.
Reset Map/Mtl to Default Settings resets the values for the map or material in the active sample slot.
Make Material Copy "cools" the current hot sample slot by copying the material to itself.
Make Unique makes a map instance into a unique copy. It also makes an instanced sub-material into a unique, standalone sub-material. It gives the sub-material a new material name. A sub-material is a material within a Multi/Sub-Object material.
Put To Library adds the selected material to the current library.
The buttons on the Material ID Channel flyout tag a material as a target for a Video Post effect or a rendering effect, or for storing with a rendered image saved in RLA or RPF file format (so that the channel value can be used in a post-processing application). The material ID value is the counterpart of a G-buffer value for objects.
This control lets you switch between displaying maps as shaded (Phong) or realistic (full detail) in viewports/
Show End Result lets you look at the material at the level you're on instead of looking at the end result of all the other maps and settings.
Go To Parent moves up one level in the current material.
Go Forward To Sibling moves to the next map or material at the same level in the current material.
Pick Material From Object lets you select a material from an object in the scene. Click the eyedropper button, and then move the eyedropper cursor over the objects in the scene. When the eyedropper cursor is over an object containing a material, it fills with "ink" and a tooltip with the name of the object pops up. Click the object. The material is placed in the active sample slot.
The Name field displays the name of the material or map. Default material names are "01 − Default," and so on, the number changing to reflect the material's sample slot. Maps are named "Map #1," and so on.
Click the Type button to display the Material/Map Browser and choose which material type or map type to use.


 (Material Editor): Compact


