


The Velocity element generates a rendering that contains information about the motion of objects in the frame. You can use the Velocity rendering to generate motion blur when you use a composition application such as Combustion or Flame. There are plug-ins for compositors that generate motion blur; for example, those created by RE:Vision Effects, Inc.
The advantages of rendering a Velocity element are that the composition application might give you finer control over the motion blur than 3ds Max does; you can render a “beauty” frame that does not contain motion blur; and the Velocity element is quicker to render than using one of the 3ds Max motion-blur effects.
Another use of the Velocity element is to re-time clips rendered in 3D. There are specialized applications that allow you to re-time an image sequence, using velocity data to generate more accurate inbetween frames.
In the Velocity rendering, the motion information is saved as RGB color information:.red saves movement on the X axis, green saves Y-axis movement, and blue saves Z-axis movement, relative to the plane of the rendered frame.
The mental ray renderer supports this element, but the mental ray Motion Blur camera effect must be turned off. Also, some mental ray materials do not support render elements.
Controls on the element's rollout let you improve the precision of the motion data saved in the rendering. See the procedure, following.
To render a velocity element for an animation sequence:
 Render Elements panel Render Elements rollout, click Add. In the Render Elements dialog that appears, highlight Velocity, and then click OK.
Having a specific Maximum Velocity value will give you more accurate velocity data.
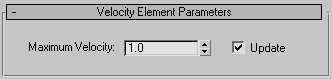
Enter a Maximum Velocity value based on the result collected by Update. Setting a Maximum Velocity increases the precision of the motion information. See the procedure, above: Procedures. Default=1.0.

 (Render Setup)