You can use a bitmap file or procedural map as a Bump map, which makes an object appear to have a bumpy or irregular surface. When you render an object with a bump-mapped material, lighter (whiter) areas of the map appear to be raised, and darker (blacker) areas appear to be low.
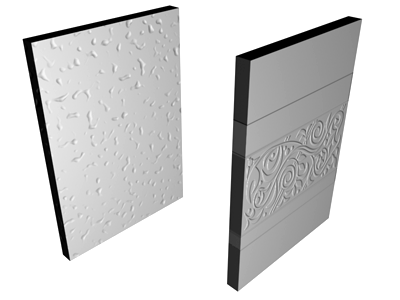
An object with two different bump maps.
A Bump map uses the intensity of the map image to affect the surface of the material. In this case, the intensity affects the apparent bumpiness of the surface: White areas protrude, and black areas recede.
Use a Bump map to take the smoothness off a surface or to create an embossed look. Keep in mind, however, that the depth effect of a Bump map is limited. If you want extreme depth in a surface, use modeling techniques instead. For example, the Displace modifier pushes surfaces or faces in and out based on the intensity of a map image. (Using a Displacement map is another way to emboss a surface.)
Grayscale images can make effective Bump maps. Maps that shade between white and black generally work better than maps with hard edges between the white and black areas.
The Bump map Amount setting adjusts the degree of bumpiness. Higher values render as higher relief; low values render as low relief.
The bumpiness is a simulation created by perturbing face normals before the object is rendered. Because of this, bumps don't appear on the silhouette of bump-mapped objects.
3ds Max opens the Material/Map Browser.
(If you choose Bitmap as the map type, 3ds Max opens a file dialog that lets you choose the image file.)
Alternatively, you can use the  Slate Material Editor to wire a map node to the Bump component.


 Material Editor