 Command entry:
 Material Editor
  Arch & Design material Special Purpose Maps rollout Self Illumination Color button
You can use a bitmap file or procedural map to control the self-illumination value. This makes portions of an object appear to glow. White areas of the map render as fully self illuminating. Black areas render with no self-illumination. Gray areas render as partially self illuminating, depending on the grayscale value.
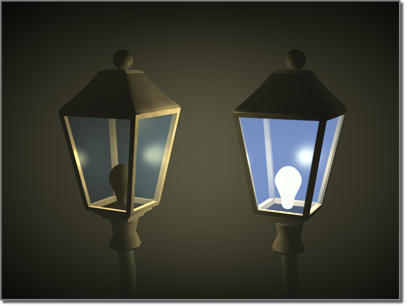
Using a Self-illumination map
Self-illumination means that the glowing area is not affected by lights in the scene (its ambient color component goes away), and does not receive shadows.
To use a Self-illumination map:
3ds Max opens the Material/Map Browser.
(If you choose Bitmap as the map type, 3ds Max opens a file dialog that lets you choose the image file.)
Alternatively, you can use the Slate Material Editor to wire a map node to the Self Illumination component.


