In addition to saving and selecting shape keys, you can also use pose-based deformation for creating shape animation. To do this, you link one or more parameters to drive the deformation on a selected cluster, then set deform keys for the different poses you want.
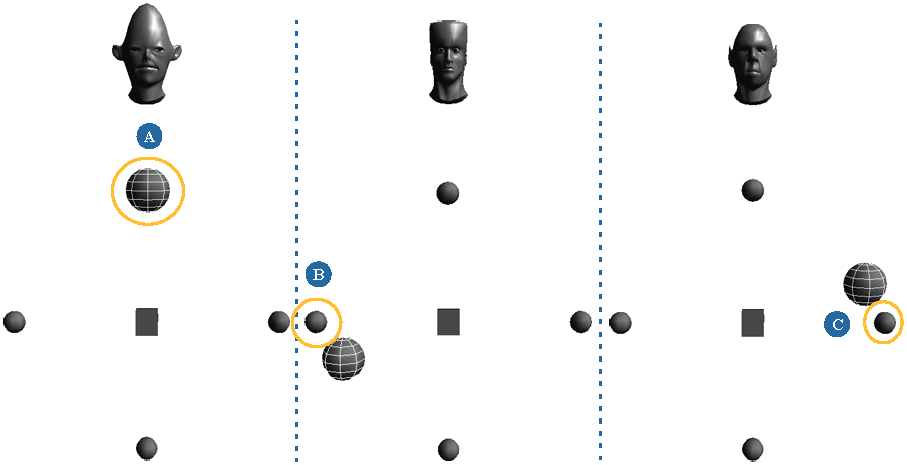
For example, you can control the blending of a shape-animated object according to the position of a sphere (its position drives the shape animation). As the sphere gets closer to a deform key associated to a certain pose (as indicated by a small sphere), the base object takes on that shape: when the sphere is between deform keys, the base object takes on a combination (interpolation) of these deform keys.
Pose-based deformations use the shape animation mechanism under the hood, as well as multi-linked parameters, which allow you to link one parameter to many using an interpolation mechanism. For example, with multi-linked parameters, you can control the scaling of an object with the position in X and Y of another.
Multi-linked parameters are discussed in Linking Parameters [Animation].
Define the set of controlling parameters and associate it to the cluster you want to deform:
Select either the Shape Modeling or Secondary Shape mode from the Construction Mode list on the main menu at the top of the interface. The mode you choose depends on how you're shape animating:
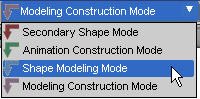
Select Shape Modeling mode (see Creating Shape Keys in Shape Modeling Mode) if you're saving deform keys to set shapes for the object or cluster.
Select Secondary Shape mode (see Creating Shapes in Secondary Shape Mode) if you're saving deform keys on an animated envelope and you want the subsequent shapes to be in reference to the envelope's animation.
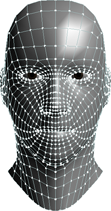
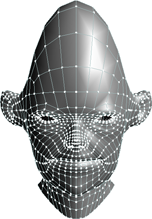
Select a cluster on the object you want to deform. The cluster can contain all points on the object, as shown with the head below.
Choose Deform  Shape Deform Keys Link Deform with and pick the parameters to which you want to link in the pop-up explorer. These are the parameters that will drive the deformation.
In this example as shown on the left, the cluster is linked to the three position (X, Y, and Z) parameters of the sphere (called dial), which is already animated.
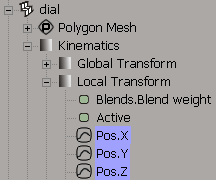
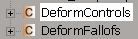
A custom parameter set called DeformControls is created containing proxies of the parameters you linked. In the explorer, you see this nested under the cluster. You can use it to modify the linked parameters (or modify them directly, if you like).
Use the Falloff slider for the cluster to set the range of where interpolation can occur. This means at what point the driving (linked) parameters stop having an influence on the output. You don't usually need to adjust this value too much, but if the deform keys are far apart, you should increase the falloff value, and decrease it if the keys are very close together.
A DeformFalloffs custom parameter set is created containing the Falloff parameter that is created for each deform key you set for the cluster.
Change the linked (driving) parameters to the value you want. In the case of this example, the dial sphere is moved to one of the key positions.
Move the points in the cluster to create a new pose, as shown below.
Select the cluster (or a point in it) and choose Deform Shape Deform Keys Save Deform Key. Save a key for each "pose" you want to keep.
Continue saving deform keys for as many poses as you want to use.
Now when you change the parameters of the driving object (in this case, moving the sphere), different deform keys are used depending on the proximity of the driving object to them as determined by the falloff.
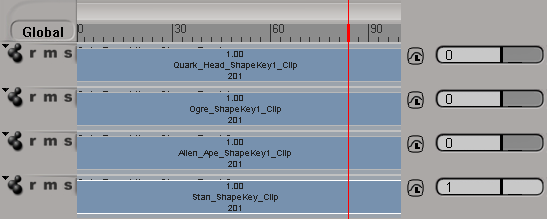
Open the mixer for the deformed object to see that a compound clip is created containing all the deform keys that you set (it contains the shapes you are creating).
An expression is placed on every shape weight and contains an interpolator using the parameters you linked. When you change the linked parameters, the interpolators compute a new weight for each of the shapes. Deform keys are actually shape keys whose weights are driven by the multi-linked parameters (one multi-linked parameter per shape).
Using the Link Deform with Orientation command, you can link a deformation with the orientation of one or more objects. This is similar to creating pose-based deformations except that you can link any parameter specifically to the orientation of objects. The orientation is a calculation of the three rotation parameters (X, Y, Z) in quaternion space.
Orientation-based deformations use the shape animation mechanism under the hood, as well as orientation-linked parameters, which allow you to link many parameters to the orientation of an object using an interpolation mechanism. Orientation-linked parameters are discussed in Linking Parameters [Animation].
One typical use for linking a deform with orientation is to set up shape blending that depends on the orientation of a character's bones. You can change the shape of the envelope at the joints, such as shoulders or elbow, according to the orientation of the associated bone.
If you're working with an animated envelope, you need to be in Secondary Shape mode to set the shapes in relation to the envelope's animated state. See Creating Shapes in Secondary Shape Mode for more information.
The process for linking with orientation is the same as with the Link Deform With command (see To deform a shape based on poses), except that you pick objects in a 3D view in a viewport instead of using a pop-up explorer to pick parameters.
Select either the Shape Modeling or Secondary Shape mode from the Construction Mode list on the main menu at the top of the interface. The mode you choose depends on how you're shape animating:
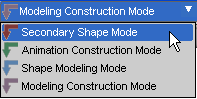
Select Secondary Shape mode (see Creating Shapes in Secondary Shape Mode) if you're saving deform keys on an animated envelope and you want the subsequent shapes to be in reference to the envelope's animation.
Select Shape Modeling mode (see Creating Shape Keys in Shape Modeling Mode) if you're saving deform keys to set shapes for the object or cluster.
Select a cluster on the object you want to deform. The cluster can contain all points on the object.
Choose Deform Shape Deform Keys Link Deform with Orientation. In a 3D view (geometry) in a viewport, pick the object whose orientation will drive the deformation.
A custom parameter set called DeformControls is created containing proxies of the parameters you linked. In the explorer, you see this nested under the cluster. You can use it to modify the linked parameters (or modify them directly, if you like).
Use the Falloff slider for the cluster to set the range of where interpolation can occur. Falloff means at what point the object's orientation stops having an influence on the output.
A DeformFalloffs custom parameter set is created, containing the Falloff parameter that is created for each deform key you set for the cluster.
You can also find the Falloff parameters by opening the model's mixer and expanding the compound clip. Right-click a shape clip and choose Clip Properties. The Falloff parameter associated to the shape is at the bottom of the property page.
Select the cluster (or a point in it) and choose Deform Shape Deform Keys Save Deform Key. Save a key for each "pose" you want to keep.
Continue saving deform keys for as many poses as you want to use.
Now when you change the orientation of the driving object, different deform keys are used depending on how close its value is to the one saved for the deform key.
For example, you can link a cluster on an envelope to the orientation of the lower arm, pose your arm at the orientation where you have a problem, correct the envelope, and save a deform key.
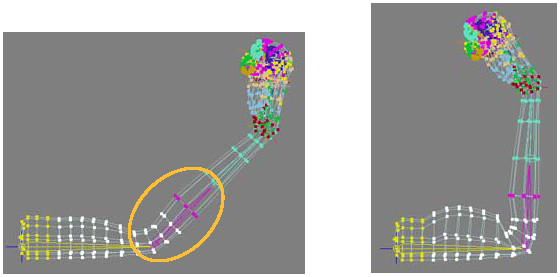
On the left, a cluster (white points) on the envelope is linked to the orientation of the arm's middle bone.
On the right, the cluster is deformed into a bulging muscle when the bone is rotated. A deform key is saved for this pose.
Then whenever the orientation of your arm approaches the one for which you saved a deform key, the corrected shape is applied on top of the envelope and is at its maximum weight (1) when you are exactly "at" the orientation.
 Except where otherwise noted, this work is licensed under a Creative Commons Attribution-NonCommercial-ShareAlike 3.0 Unported License


