Shader Family: Surface Material
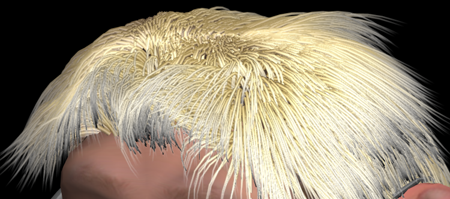
Controls the diffuse, ambient, and specular RGB colors, transparency, and indirect illumination of hair objects using gradient sliders so that you have a high degree of control over where the shading occurs on the hair strand.
For an example of using a texture map for colors, see Connecting a Texture Map to Hair Color Parameters [Hair]. For other topics related to rendering hair, see Rendering Hair [Hair].
| Name |
The shader's name. Enter any name you like to give it a unique identity, which is especially useful when selecting hair elements. |
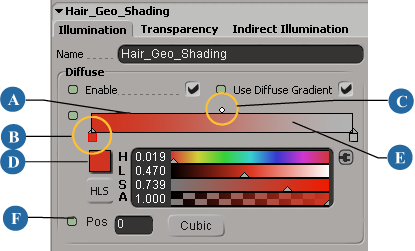
You can choose to use the regular color controls or gradient sliders to set the hair's Diffuse color.
| Enable Diffuse Shading |
Uses the diffuse color settings for the hair as defined with the regular color controls. |
| Use Diffuse Gradient |
Uses the diffuse color set with the gradient slider that appears when you select this option. If this option is off, you can use the regular color controls found when you select Enable Diffuse Shading. |
| Gradient Slider |
The gradient slider determines the diffuse color value along the hair strand's length. The left end of the slider represents the hair strand root and the right end represents the hair strand tip. For information on using the gradient sliders, see Using the Gradient Controls. |
You can choose to use the regular color controls or gradient sliders to set the hair's Ambient color.
Ambient color is weighted by the scene's global ambience.
| Use Ambient Gradient |
Uses the Ambient color settings for the hair as defined by the gradient slider that appears when you select this option. If this option is off, the ambient color settings are defined with the regular color controls. To get luminescent hair, use a high value for the Ambient parameter. |
| Gradient Slider |
The gradient slider determines the ambient color value along the hair strand's length. The left end of the slider represents the hair strand root and the right end represents the hair strand tip. For information on using the gradient sliders, see Using the Gradient Controls. |
| Use Blend Gradient |
Uses the Blend color settings for the hair as defined by the gradient slider that appears when you select this option. This determines what percentage of the diffuse and ambient colors are used along the hair strand. The left end of the slider represents the hair strand root and the right end represents the hair strand tip. A value of 1 means that both Diffuse and Ambient are visible, and a value of 0 means that only Ambient is visible. |
| Gradient Slider |
Determines the diffuse and ambient color blend along the hair strand's length. The left end of the slider represents the hair strand root and the right end represents the hair strand tip. A value of 1 means that both Diffuse and Ambient are visible, and a value of 0 means that only Ambient is visible. For information on using the gradient sliders, see Using the Gradient Controls. |
| Enable |
Enables the calculation of specular highlights and uses the Specular color settings for the hair as defined with the regular color controls. |
| Use Specular Gradient |
Uses the Specular color settings for the hair as defined by the gradient slider that appears when you select this option. If this option is off, you can use the regular color controls found with the color type. |
| Gradient Slider |
Determines the specular color value along the hair strand's length. The left end of the slider represents the hair strand root and the right end represents the hair strand tip. For information on using the gradient sliders, see Using the Gradient Controls. |
| Specular Decay |
Controls the size and falloff of the specular highlights. This option is unavailable if you select the Use Specular Gradient option. |
| Specular Decay Root / Tip |
When you select the Use Specular Gradient option, you can also set the location (root and tip) and value of the specular decay along the length of the hair strand using its own gradient slider. The left end of the slider represents the hair strand root and the right end represents the hair strand tip. The gradient is used as a weighting factor to modulate the hair root and hair tip shininess. |
| Enable |
Enables the calculation of transparency values along only the length of the hair strand. |
| Gradient Slider |
The gradient slider determines the transparency value along the hair strand's length. The left end of the slider represents the hair strand root and the right end represents the hair strand tip. A value of 0 is completely opaque and 1 is completely transparent. For information on using the gradient sliders, see Using the Gradient Controls. |
| Enable |
Enables the calculation of transparency values across the hair strand. |
| Gradient Slider |
The gradient slider determines the transparency value across the hair strand. The left end of the slider represents the hair strand edges (rim) and the right end represents the hair strand center (core). A value of 0 is completely opaque and 1 is completely transparent. For information on using the gradient sliders, see Using the Gradient Controls. |
Translucency allows light to partially or diffusely pass through the hair strands. The Hair Geo shader computes the illumination from both sides of the hair and adds the result.
| Enable |
Activates the calculation of translucency on the hair. |
| Translucency |
If you select Enable, you can use this slider to set the hair strand's overall translucency level. A value of 0 is no translucency (completely opaque), and 1 is full translucency. |
| Translucency Gradient |
Activates translucency using the gradient controls. The gradient slider determines the translucency value along the hair strand's length. The left end of the slider represents the hair strand root and the right end represents the hair strand tip. A value of 0 is completely opaque and 1 is completely translucent. For information on using the gradient sliders, see Using the Gradient Controls. |
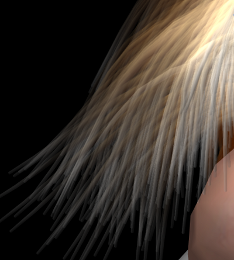
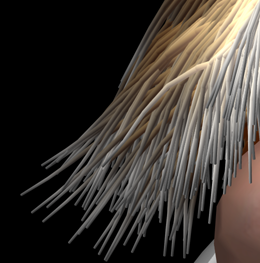
Hair with high translucency values along most of the hair strand, then lessening at the root.
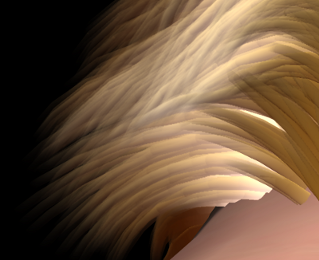
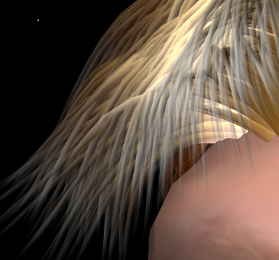
Adds an emissive color to the hair strand on top of the hair shading. This lets you create glow effects and allows the hair to appear more "tubular" when a light color is used on the inner core of the hair strand and a darker color is used on the edges (rim) of the strand.
With a light color used on the rim, you can create the effect that the hair is lit from behind.

|

|
| On the top, incandescence is on the inner part of the hair strand. On the bottom, incandescence is on the rim of the hair strand. |
The different gradient sliders in the Hair Geo Shading shader's property editor let you adjust the parameter's value using standard gradient controls as described here.
This surface shader can be connected directly to the Surface and Shadow inputs of the Material node of a hair object. You can use textures to control color inputs (such as Diffuse or Ambient Color). Alternatively, you can attach an illumination shader such as Phong to the Hair Geo Shading's material input to replace the shader's own illumination calculations.
You could use an image shader or procedural shader to "texture" the hair. Or use the Scalar State shader to extract the hair length/crosswise information, which can then be regrouped into a vector (Scalars2Vector shader). This vector can then be used to lookup a procedural noise or image.
 Except where otherwise noted, this work is licensed under a Creative Commons Attribution-NonCommercial-ShareAlike 3.0 Unported License