When you create a surface or polygon mesh by extruding with two profiles, the first profile morphs into the second profile as it runs along a single rail curve. The distance between points determines which end of which profile is connected to each end of the rail.
Select the rail curve, then add the two profiles to the selection. You can select curve objects as well as U or V isolines, U or V knot curves, boundaries, surface curves, and trim curves.
Choose one of the following commands from the Model toolbar:
If you didn't select the curves in step 1, you can pick them now. This creates an object and the Extrusion 2 Profiles property editor opens.
Adjust the parameters as desired. For more information, see Extrusion 2 Profiles Property Editor [Properties Reference].
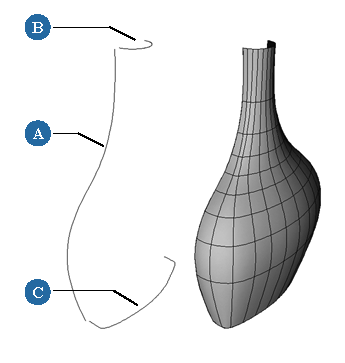
Extrusion with two profiles showing the rail curve (A), the two profile curves (B and C), and the result.


 Surf. Mesh