Normally, when there is an action clip in the mixer, it overrides any other animation on that object that covers the same frames. However, by selecting an option in the Mixer Properties editor, you can blend fcurves directly with an action clip over the same frames. This allows you to blend mixer animation with scene level animation.
For example, you can paste a clip in the mixer that contains the final animation for an object, then you can blend it with other fcurve animation you have added to that object, such as a slight offset or a minor adjustment to a mocap clip.
Being able to mix clips directly with fcurves means that you can easily create animation using the mixer, as well as using it for blending and tweaking final animations. You can keep manipulating and setting keys for the animated object and not have to make its animation into a clip to blend it with another clip.
To mix fcurves with action clips
Make sure that the object has an action clip in the animation mixer at the current frame.
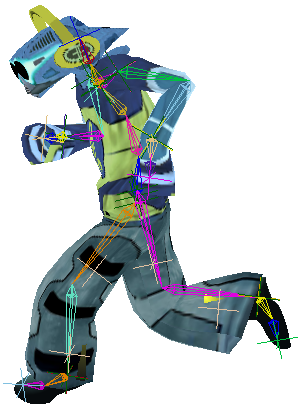
Club-bot with a run action clip active in the animation mixer.
Open the model's animation mixer (press Alt+0) and choose Mix  Animation Mixer Properties from the mixer's command bar to open the Mixer Properties editor.
Select the Mix Current Animation option to blend the current action clip with the underlying fcurves on the object's parameters.
Select the object and set keys for one or more of the same parameters that are contained in the current action clip.
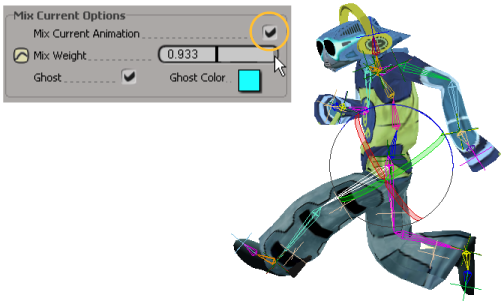
The Mix Current Animation option is selected, then the left leg and arm are rotated a bit and then keyed. The Mix Weight value determines how much influence the fcurve animation has over the animation in the clip. Key this parameter to blend the fcurves in and out of the action clips.
Use the Mix Weight slider to control the weight assigned to the parameter's fcurve animation that is being mixed with the action clip.
With the Mix Weight value set to 1, this is 100% of the fcurve animation. Note that this also includes the object's current "non-clip position" (mute the action clip's track to see it) as well as any offset keys you may have set. In the example above, Club-bot was in a standing position when rotation offset keys were added to his left arm and leg, so that influence is seen when it is blended in to the action clip.
Set keys on the Mix Weight parameter to blend the fcurves in and out of the action clip. For example, you can set zero keys (anchor keys) with the the Mix Weight parameter set to 0 (fcurves have no weight) on either side of a key on the Mix Weight value set to 1 (fcurves have 100% weight). The fcurve animation blends in with the action clip, then out again.
For more information in general about mixing clip weights, see Mixing and Weighting Clips.


