The ICE tree view is where you build ICE trees by connecting nodes.
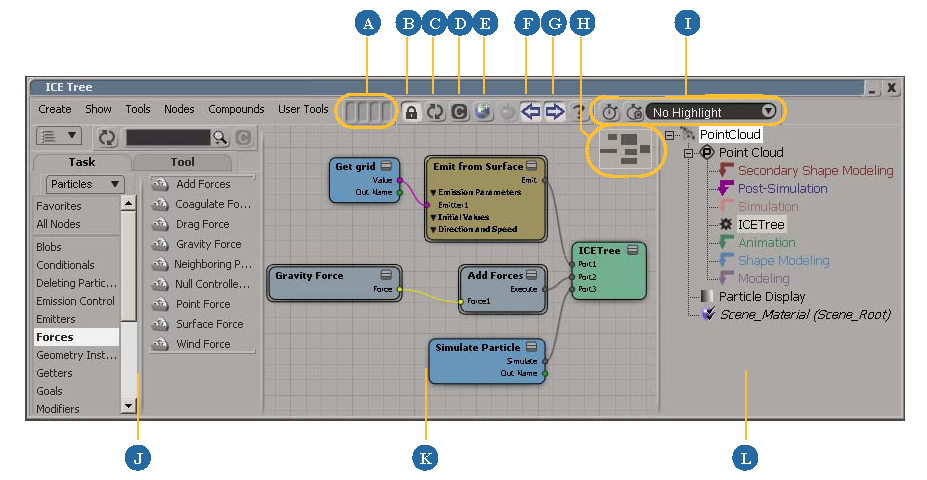
| A |
Memo cams: Store up to 4 views for quick recall. Left click to recall, middle-click to save, Ctrl+middle-click to overwrite, and right-click to clear. |
| B |
Lock. Prevents the view from updating when you select other objects in the scene. |
| C |
Refresh. When the view is locked, forces it to update with the current selection in the scene. |
| D |
Clear. Clears the view. |
| E |
Opens the preset manager in a floating window. See The Preset Manager [Interface and Tools]. |
| F |
Displays or hides the preset manager embedded in the left panel (J). |
| G |
Displays or hides the local explorer embedded in the right panel (L). |
| H |
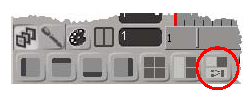
Bird's Eye View. Click to view a specific area of the workspace, or drag to scroll. Toggle it on or off with Show |
| I |
Control timers and display performance highlights. See Profiling the Performance of ICE Trees. |
| J |
Embedded preset manager. See The Preset Manager [Interface and Tools]. You can press Ctrl+F to quickly put the cursor in the preset manager's text box so that you can start typing a search string. Pressing Ctrl+F will also temporarily display the preset manager if it is hidden. |
| K |
ICE tree workspace.
|
| L |
Local explorer. When there are multiple ICE trees on the same object, click to select the one to view. You can also click on a material to switch to the render tree view. |
There are several ways to display the ICE tree view:
To open it in a floating window, choose View  General ICE Tree or press Alt+9.
To open it docked in a viewport, choose ICE Tree from the Views menu.
To open in docked in the bottom view with an explorer in the top left view, switch to the ICE toolbar and click the rightmost icon at the bottom left of the interface.
Selecting and Moving Nodes in the ICE Tree View
The default tool in the ICE tree view is the Select and Move tool. If a different tool is active, you can activate the Select
and Move tool by pressing the spacebar or by choosing Tools Select and Move Tool. Selected nodes are displayed with a white border and name label.
Click on a node to select it, or drag diagonally to select all nodes within a rectangle.
Middle-click to branch-select a node, that is, to select a node and all nodes upstream from it recursively.
Press Shift in combination with the above to add to the selection.
Drag in combination with the above to move the corresponding nodes.
Click in the background to deselect all nodes.
Navigating in the ICE Tree View
The ICE tree view uses the same navigation controls as other views in Softimage:
In addition, you can quickly pan by clicking and dragging on the background of the view with the middle mouse button, and use the Bird's Eye View to quickly move to a specific part of the tree.
Use the Z key to activate the Pan and Zoom tool.
Press and hold the middle mouse button to zoom in on the pointer's location.
Press and hold the right mouse button to zoom out from the pointer's location.
Use the S key to activate the Navigation tool:
Press Shift+Z to activate the Rectangular Zoom tool. This tool is also available from the Tools menu.
By default, you can zoom using the mouse wheel. Scroll forward to zoom in and backward to zoom out. Press Ctrl to zoom quickly, Shift to zoom slowly, and Ctrl+Shift to zoom even more slowly.
If desired, you can disable the mouse wheel zoom or restrict it to the Navigation tool so that you can use the mouse wheel with other tools. See Mouse Wheel in Camera Preferences [Preference Reference].
The bird's-eye view is a miniature "map" of your ICE tree in the upper right corner. To toggle it on or off, choose Show Bird's Eye View.
Use the bird's eye view to quickly move about your tree. The extent of the current display is shown as a white outline.


