In real life, all objects have material properties which define them. In Lagoa, all point clouds or polygon meshes must also have material properties to define them so that the simulator knows how to calculate them. These materials are appropriately set in a Lagoa Material node.
Material nodes are basically big groups of Set Data nodes: they set the point's material data that is to be computed by the simulator, which solves all materials in the simulation at once.
For example, some metals undergo a type of plastic deformation, meaning that after they are deformed, they don't come back to their rest shape. This can be simulated by using both plastic and elastic properties.
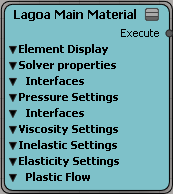
The Lagoa Material Cloth node is the standard material compound used for setting the material properties of a point cloud. It exposes all supported attributes that can be activated and calculated in the Lagoa Simulate Multiphysics node, which is the simulator.
It's important to remember that if you set a certain material, you need to activate the corresponding option in the Simulate Multiphysics node so that those properties are solved in the simulation. For example, if you set the Viscosity parameters in the Material node, make sure to select the Enable Viscosity option in the Simulate Multiphysics node.
All other Lagoa Material compounds in the Lagoa Main Material group are simply "subsets" of the Lagoa Main Material compound, with various properties being hidden if not needed for the type of material they're creating, such as Foam, Jello, Thick Liquid, and so on. For example a cloth material doesn't need to have Surface Tension properties, so those properties are not exposed for the Material Cloth node.
You can have more than one material defined for a point cloud in its ICE tree. For example, one material could be water, one could be oil, then you can define a phase in which you can use each material.
See Creating Phases for Lagoa Effects for more information on this.
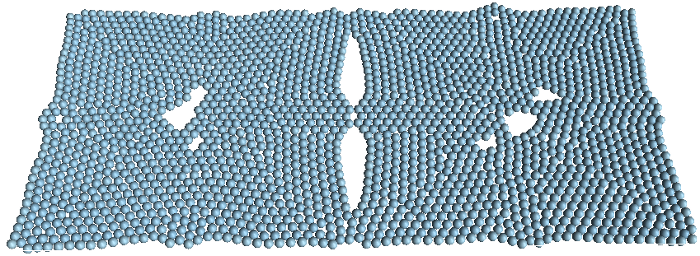
Elasticity is the ability of a material to return to its original shape after a deformation has occurred. In Lagoa, elasticity is controlled by spring-like connections between points that create a structure.
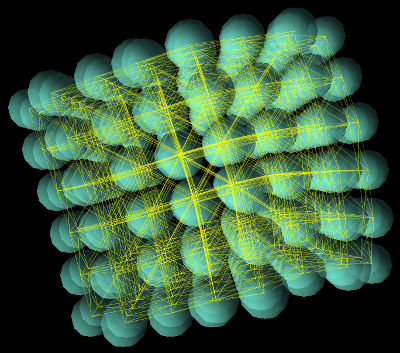
The elastic structure is displayed as points being joined with yellow links that are horizontal, vertical, and diagonal.
You can set a material's elasticity by setting the Elasticity Settings parameters in the Material compound (see Lagoa Material Cloth).
Then select the Enable Elastics option in the Lagoa Simulate Multiphysics node to use the Elasticity settings when calculating the whole simulation.
You can set separate substeps value for only the Elastic Settings parameters using the Elastic Substeps option in the Lagoa Simulate Multiphysics node — see Setting the Simulation's Substeps for Accuracy for more information.
Tearing Elastic Structures Apart
While you usually want an elastic structure to stay together, you may also want to have it rip apart based when some force provides too much resistance for it.
The values of the Elasticity Breaking Point and other Elasticity options in the Material compound determine how much deformation is necessary to break the links in the elastic structure (see Lagoa Material Cloth).
You must then select the Allow Structure Tearing option in the Lagoa Simulate Multiphysics node to allow elastic structures of points to be torn apart.
If you have points that stick to collision objects, select the Elasticity at Boundaries option in the Material compound to allow this. Then for each collision object, set the Elastic Breaking Point value in its Lagoa Set Collision Data compound.
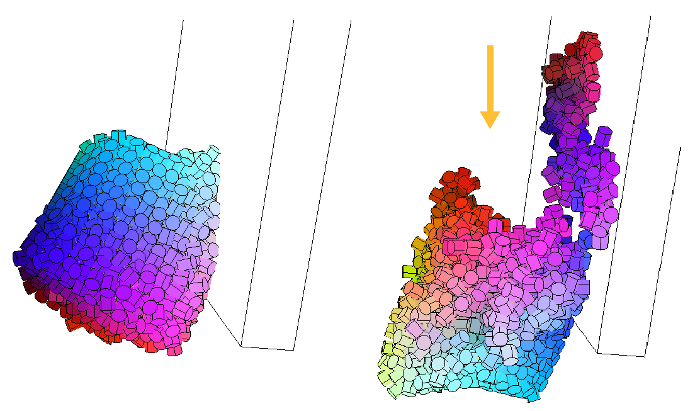
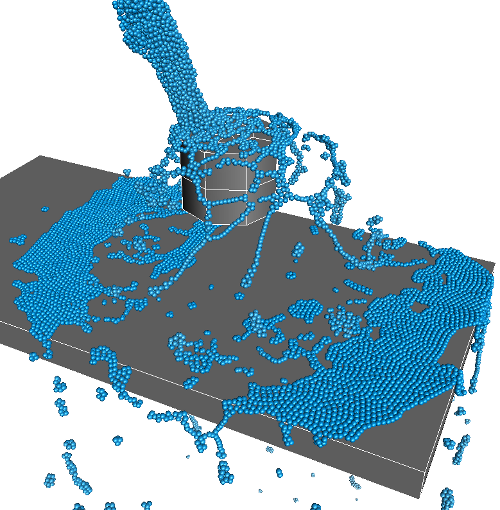
On the left, the Elasticity and Elastic Breaking Point values are fairly high so that the object bounces off the collision object.
On the right, the Elasticity value is the same, but the Elastic Breaking Point value is much lower so that the structure rips when the surface friction on the collision object and the gravity force are too strong for it.
With elastic structures, you can consider each frame's emission of points to be a separate cluster so that it behaves as a separate object that doesn't merge with other clusters. For example, you may want to emit "cloth sheets" every few frames, but not have them all merge together into a single elastic structure.
Of course, you can also choose to have clusters merged together. Each cluster has an ID, and only clusters with the same ID can merge together.
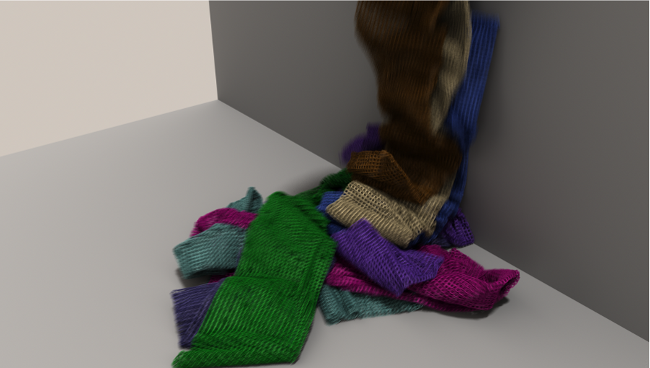
Image courtesy of Lagoa Multiphysicsª
Point cloud "cloths" are emitted as clusters so that they don't merge together.
For the points that you want to merge, give them matching Cluster IDs in their Emit nodes. Only clusters with the same ID can merge together.
Deselect the Cluster by Geometry and Cluster at Emission options.
Select the Solve Plasticity option in the Lagoa Simulate Multiphysics node.
Inelasticity is the amount of rigidity that the points have, causing them to become rigid and inelastic when interacting with each other or with a collision object. Friction is the resistive force acting between bodies that tends to oppose and dampen motion.
You can set a material's inelasticity by setting the Inelastic Settings parameters in the Material compound (see Lagoa Material Cloth).
Then select the Enable Inelastics option in the Lagoa Simulate Multiphysics node to use the Inelastic settings when calculating the whole simulation.
You can set separate substeps value for only the Inelastic Settings parameters using the Inelastic Substeps option in the Lagoa Simulate Multiphysics node — see Setting the Simulation's Substeps for Accuracy for more information.
Viscosity is the level of resistance to flow in a fluid. Lower values simulate the flow of a watery liquid, while higher values create a more syrupy fluid.
Heavier fluids also depend on gravity to define their behavior. By decreasing the gravity, you slow down the fluid dynamic (the result is similar to increasing the viscosity), and vice-versa.
The particle's mass also makes a difference in the viscosity of the fluid—make sure to set this to an appropriate level for the right effect. A larger mass value makes for more viscose results.
You can set a material's viscosity by setting the Viscosity Settings parameters in the Material compound (see Lagoa Material Cloth).
Then select the Enable Viscosity option in the Lagoa Simulate Multiphysics node to use these settings when calculating the whole simulation.
Particles with a Viscosity value of 80. The Surface Tension value also has a big effect on creating viscous fluids.
Surface tension is the degree of tension among individual particles, like the attraction among water molecules to create a cohesive unit. Generally, the surface tension tries to reduce the total area occupied by the fluid, where the fluid tries to "go back" on itself and group as closely as possible.
Due to surface tension, particles that simulate liquid tend to form into a spherical shape, like a water drop, as they fall down.
You can set a material's surface tension by setting the appropriately named Surface Tension parameter in the Material compound (see Lagoa Material Cloth).
For example, you may want a highly viscous liquid like honey to stay on a spoon when you remove it from a pot. Or if a liquid is flowing on a table, you might want the liquid to also flow underneath the table. In both these cases, you can increase the surface tension to make these types of flow possible. Lower values let the fluid move more freely because the particles do not stay together that much (think of water).
Make sure to select the Enable Pressure option in the Lagoa Simulate Multiphysics node to use all Pressure settings when calculating the whole simulation.
With the Surface Tension value set to 2, particles tend to pull together as they get close to each other.
The Internal Pressure parameter also acts as an attraction force among the particles, and the External Pressure parameter helps to keep the particle "element" in a cohesive shape as a whole.
Pressure is a field that governs the incompressibility of fluids and guides them to a rest state. Lower pressure zones guide the fluid to higher pressure zones, while higher pressure zones guide the fluid to lower pressure zones. The pressure is transferred from one point to another inside of the fluid. This movement continues until the fluid reaches its rest state, at which point it is considered stable.
Fluids under high pressure always try to "get out" to a more stable position, moving to lower pressure zones. Fluids in lower pressure zones try to regroup as a volume using surface tension, until the rest density is met. In Lagoa, this rest state is based on the Surface Tension parameter.
The Pressure parameters in the Material compound (see Lagoa Material Cloth) define a wide range of pressure reactions, letting you model things such as expanding, compressing, and tensioning effects on both liquids and elastic objects.
Inelastic settings can also be used with pressure, in which case the pressure becomes a "liquid bridge" between the points, creating wet granular materials that have high friction.
The Lagoa pressure model uses two pressure coefficients: one as an attraction between points (Internal Pressure), and the other as a repulsion between points (External Pressure). The balance between the two is their rest density.
Like opposite sides of a coin, a low value of one pressure parameter is similar in effect to a high value of the other. If you want, you can choose to use just one pressure type. The simulator can operate with both pressure functions at the same time, or with only one.
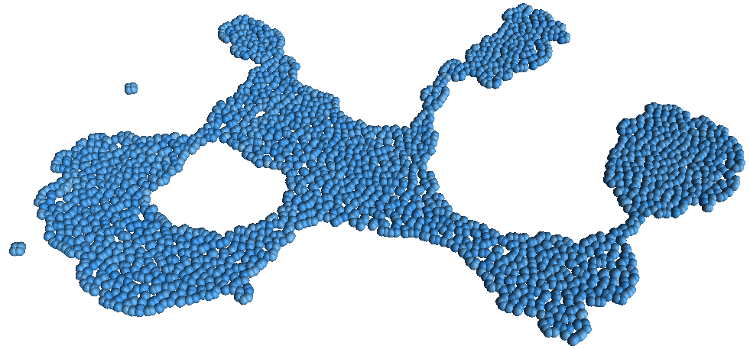
When points are within a certain distance of each other, Internal Pressure makes the points form clusters like drops and trails. This is visually related to surface tension and thickening effects of a fluid.

Internal Pressure has a value of 0.2.
Surface Tension is set to 2, and External Pressure is set to 1.
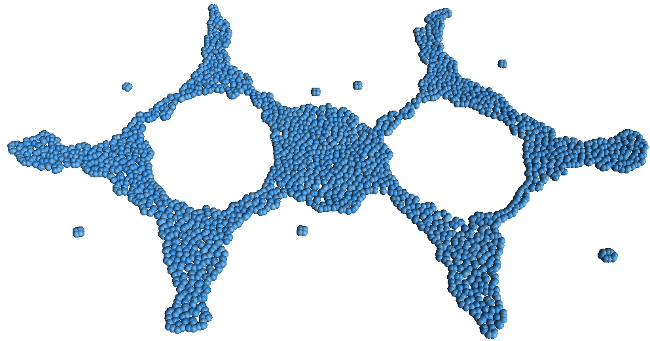
Internal Pressure has a value of 1.
The particles have a very strong attraction to each other when they're in close proximity, creating a tight formation.
External Pressure tries to retain the shape of the whole point cloud's volume by pushing the points away from each other to prevent compression, which is especially noticeable in fluids.
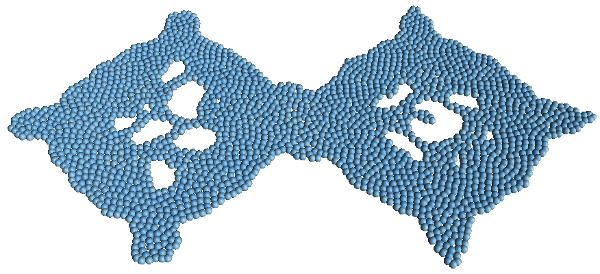
External Pressure has a value of 0.5.
Surface Tension is set to 2, and Internal Pressure is set to 0.1.
External Pressure has a value of 2.
The particles as a whole keep their structure as the particles push away from each other.


