The following workflow shows an example of a basic cloth effect of a shirt being nailed to a torso at the waist. The same basic workflow can be applied to a curve object to create a Syflex Curve simulation.
| 1 |
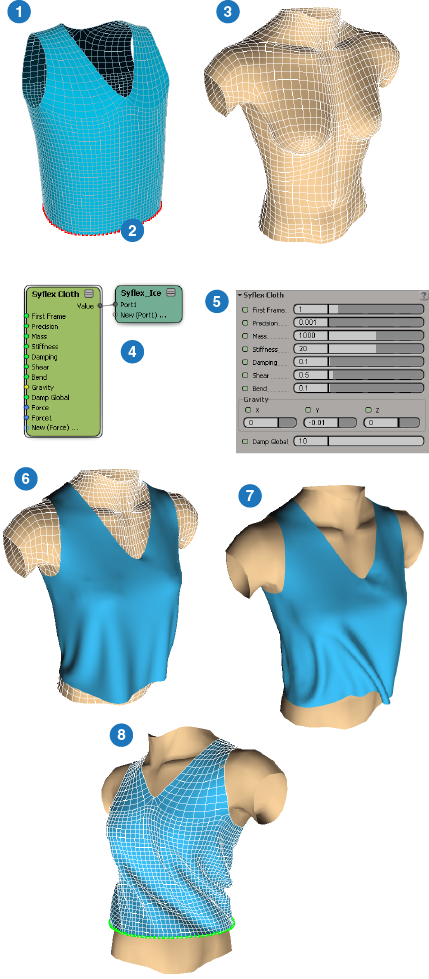
Create the cloth geometry using a polygon mesh grid - see Creating the Cloth Geometry. |
| 2 |
Create clusters on the cloth object for constraints (you can also use nulls) - see Syflex ICE Constraints. |
| 3 |
Create one or more collision objects for the cloth - see Syflex ICE Collisions. |
| 4 |
Create a simulated ICE tree for the cloth object - see Creating Syflex ICE Simulations. |
| 5 |
Set basic cloth properties in the Syflex Cloth node. This includes the stiffness, shear, and bend, as well as the built-in gravity and damping forces - see Creating Syflex ICE Simulations. This allows you to test the cloth stretching and speed of animation before the scene becomes to complex. |
| 6 |
Set up collisions with objects and/or the cloth itself - see Syflex ICE Collisions. |
| 7 |
Add forces to the ICE tree - see Syflex ICE Forces. |
| 8 |
Create constraints on the cloth using clusters (or nulls) - see Syflex ICE Constraints. |
| 9 |
Play the simulation - see Playing and Caching Syflex ICE Simulations. |
Once you have an ICE tree set up, you can add other Syflex compounds or nodes, or use most ICE nodes as you would normally. See Task Tab - Syflex and the Syflex nodes in ICE Nodes for a description of each Syflex compound and node.