An item is active for modification when you position the cursor over it in the . When you stroke a sculpt tool across the model, Mudbox automatically selects and modifies the affected vertices.
For some operations, you must explicitly select items on the model. To do this, you use tools on the Select/Move Tools tray.
The selection tools let you select faces and entire models so you can:
- Translate, rotate, or scale objects (models) in the .
- Specify an axis of symmetry for the and symmetry features.
- Hide faces or entire models in the to improve interactive performance when working on complex models.
- Export a selected model to a separate file.
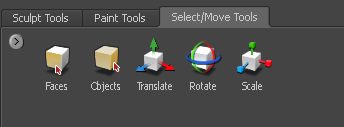
Select faces
- In the tool trays area, click the tab.
- In the tray, click the selection tool.
- In the , drag on the faces you want to select.
- To deselect faces, click an empty area.
Note
To select a face without exiting the current sculpting tool, press V while sculpting the selection, then release the V key
when you are finished. This behavior works with all tool number hotkeys (1, 2, 3, and so on).
Select all faces on the current subdivision level
- In the , position the cursor over the model at the subdivision level you want to select (use or to display the subdivision level you want), then press .
Select objects
- In the tool trays area, click the tab.
- In the tray, click the selection tool.
- In the , click the object(s) you want to select.
Note

If you select two or more objects, the transformation tools (, , ) transform the objects as a group around a common pivot (the pivot of the active object). Non-proportional scaling is limited
to the local space of each object.
Pressing the X hotkey and dragging to transform objects works on a single object at a time, even if other objects are selected.
Deselect faces or objects
- In the click an empty area.
Create and select a selection set
You can create sets of selected components for your model so you can quickly select the items together later.
For example, you can create a selection set for faces in a particular region of a model so you can freeze and unfreeze them
repeatedly as you work. A selection set lets you define this region as a custom selection.
In addition, if you’ve combined a number of polygon meshes into one model prior to importing to Mudbox, it can be difficult
to select the various components. Creating a selection set lets you easily select those regions on the combined model in Mudbox.
NoteIn Autodesk Maya, selection sets are called sets and can be exported with an .fbx or .obj file. Autodesk 3ds Max refers to these as selection sets. To preserve sets when exporting a model from Maya, select . Set the to and turn on the for , then click Mudbox does not export selection sets when exporting using FBX. For more information on importing a model from Maya, see
Import a model from Maya.
In Mudbox, selection sets appear in the and are saved with the model as part of the .mud file.
- In the , use the or selection tools to select components on the model you want contained in the selection set.
- From the main menu, select .
- Type a name for the selection set in the window that appears, then click .
The selection set appears in the list of items within the .
- To select a selection set, click its name within the .