For more information about displacement, see Displacement maps.
Note
- Avoid using textures for displacement mapping. The basic characteristics of environment mapping preclude accurate calculations when used
for displacement mapping.
- During bump or displacement mapping, if an image file contains a mask channel, the mask channel is used for displacement and
bump mapping. If the mask channel is absent, the luminance of the RGB is used to displace and, or bump map.
If you prefer to use the luminance information as the alpha, turn on the attribute (in the section of the file texture’s ).
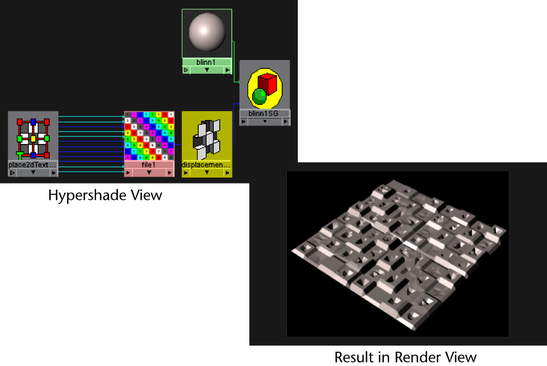
To create a displacement map
- In the window, create the desired material, for example, a , and middle-drag the material swatch onto the object in the scene view.
- In the , click on the tab.
- Double-click the shading group swatch to open the .
- In the shading group , click the map button beside the attribute and select the desired texture.
- Click the Render the current frame button to see the render results.
 Except where otherwise noted, this work is licensed under a Creative Commons Attribution-NonCommercial-ShareAlike 3.0 Unported License