You can create namespaces in the Namespace Editor as well as when you reference or import a file into your scene. When you create a namespace during file referencing or importing, the file name is used as the namespace by default.
You can also create namespaces from the command line using the -namespace -add "newNs" MEL command.
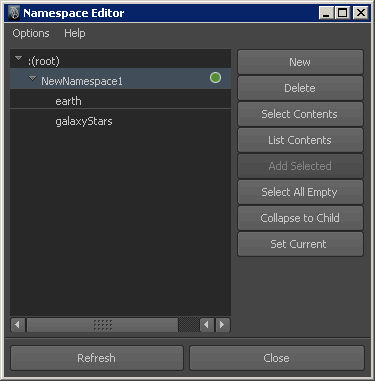
After you create a namespace you can edit it using the Namespace Editor. See Edit namespaces.
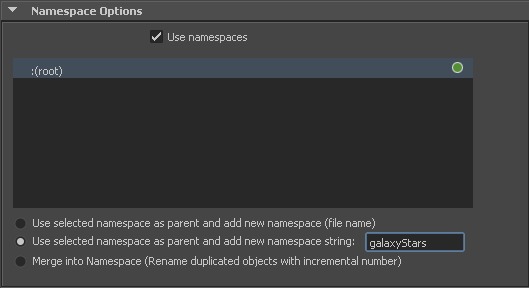
When you are creating a file reference or importing a file, you can create the namespace used by the referenced and imported objects.
To create a namespace during file referencing or importing
 .
.
In the case where duplicate namespaces occur, the namespaces are merged and duplicate object names are incrementally suffixed with a number. Use this option to avoid an accumulation of new namespaces each time your referenced or imported objects have the same namespace.
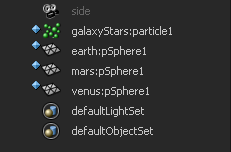
The file is referenced into the parent scene. If you open the Outliner, you can see that the object names for the referenced objects are all prefixed with either the referenced file's name or your namespace text string.
You can edit namespaces using the Namespace Editor, Reference Editor or by using MEL commands. For more information see Namespace Editor Overview, Reference Editor overview, and Work with file references.
You can use the following MEL commands to create namespaces in the command line. -add "newNS"flag with -namespace command to create a namespaces in the command line:
You can also create namespaces when renaming nodes by specifying the namespace name of the new node.
rename "ns1:obj1" ":newNs2:obj1" creates a new newNs2, namespace if it doesn't already exist.
 Except where otherwise noted, this work is licensed under a Creative Commons Attribution-NonCommercial-ShareAlike 3.0 Unported License