Sculpting > 
Select and move items


An item is activated for modification whenever the cursor is positioned over it in the 3D View. That is, when you stroke a sculpt tool across the model, Mudbox automatically selects and modifies the affected vertices.

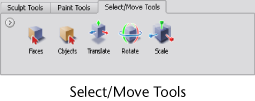
For some features and operations, you must explicitly select items on the model. To do this you must use the features located on the Select/Move Tools tray.

The selection tools let you select faces and entire models so you can:

Select/Move Tools presets

The following describes the tools that appear on the Select/Move Tools tray:

Tool name Icon Purpose

Faces

Selects indivdual faces as you stroke over the model. Editing the Size property lets you increase or decrease the area of selection for the stroke.

Clicking off the model in the 3D View, cancels the current selection.

Objects

Selects the object as you stroke over the model. Editing the Size property lets you increase or decrease the area of selection on the stroke.

Clicking off the model in the 3D View cancels the current selection.

Translate

Lets you move items by dragging the transform manipulator. Drag any arrow that appears at the center of the object to move along that axis. Drag the center handle to move freely across the 3D View.

Rotate

Lets you rotate items by dragging the rotate manipulator. Drag the circular rings on the manipulator that appears at the center of the object to rotate about the different axes.

Scale

Lets you scale items proportionally or non-proportionally by dragging the scale manipulator. Drag any manipulator box that appears at the center of the object to scale non-proportionally along that axis. Drag the center manipulator box to scale uniformly in all directions.

Select faces

  1. In the tool trays area, click the Select/Move Tools tab.
  2. In the Select/Move Tools tray, click the Faces selection tool.
  3. In the 3D View, drag on the faces you want to select.
  4. To deselect faces, click an empty area within the 3D View.
NoteTo select a face without exiting the current sculpting tool, press V while sculpting the selection, then release the V key when you are finished. This behavior works with all tool number hotkeys (1, 2, 3, and so on).

Select all faces on the current subdivision level

  1. In the 3D View, position the cursor over the model at the subdivision level you want to select (use Page Up or Page Down to display the subdivision level you want), then press the Shift + A.

Select objects

  1. Click the Select/Move Tools tab to display the Select/Move Tools tray.
  2. In the Select/Move Tools tray, click the Objects selection tool.
  3. In the 3D View, click the object you want to select.

Deselect faces or objects

  1. In the 3D View, click an empty area within the 3D View.

Create and select a selection set

You can create sets of selected components for your model so you can quickly select the items repeatedly and consistently later.

For example, you may want to create a selection set for some faces in a particular region of a model so you can freeze and unfreeze them repeatedly as you work. A selection set lets you define this region as a custom selection.

In addition, if you’ve combined a number of polygon meshes into one model prior to importing to Mudbox, it can be difficult to select the various components. Creating a selection set lets you easily select those regions on the combined model in Mudbox.

NoteIn Autodesk Maya, selection sets are called Quick Select sets and can be exported with the .obj file. To preserve Quick Select sets when exporting a model from Maya, select File > Export Selection. Set the File Type to OBJexport and turn on the File Type Specific Options for Groups, then click Export Selection. For more information on importing a model from Maya, see Import a model from Maya.

In Mudbox, selection sets appear in the Object List and are saved with the model as part of the .mud file.

  1. In the 3D View, using the Objects or Faces selection tools found in the Select/Move Tools tray, select the components on the model you want contained in the selection set.
  2. From the main menu, select Create > Selection Set.

    A window appears to let you type a unique name for the selection set.

  3. Type a name for the selection set, then click OK.

    The selection set appears in the list of items within the Object List.

  4. To select a selection set, click its name within the Object List.

Related topics

Selection Set properties