Introducing Local Subdivision
Hardware limitations will always bound the number of polys that can be displayed and manipulated at once. Mudbox offers a way to work within these limitations through "local subdivision".
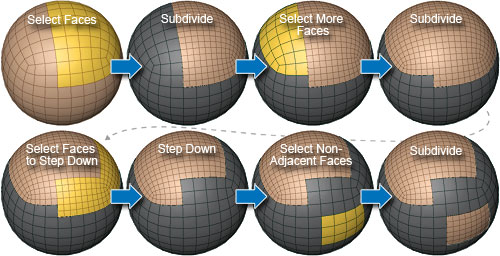
A workflow using local subdivision.
Locally subdividing selected faces subdivides only those faces to the next level. Think of local subdivision as a window on a lower level for viewing faces on a higher level. You can make the window larger by selecting faces neighboring the local subdivision and subdividing those, too [see image above]. Or you can make the window smaller by stepping down selected faces that are within the local subdivision area.
Using Local Subdivision
For example, you may have a hero creature or environment that requires 40 million polys to describe its shape and detail. Even if your system could display this mesh density, the model would be unworkable. Local subdivision provides a way to subdivide, display, and sculpt only those areas you need to at any given moment, enabling you to work within the technical limitations of your machine.
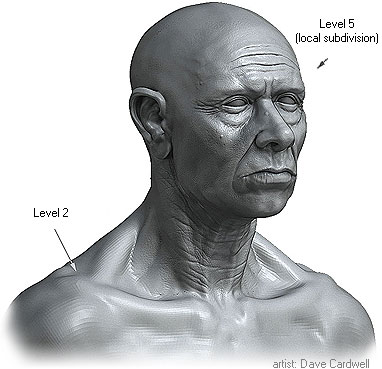
Your machine might allow you to work comfortably with only 2 million faces on screen at once. That's fine. Subdivide just the head of the creature up to 2 million, leaving the rest of the creature at level 0, and sculpt in the required detail. Then, step the head back down to level 0 and move on to the neck region, subdiving it up to 3 million -- or to whatever level is needed to hold the amount of detail required for that region. When you are through, either choose a level and export a seamless mesh that is uniformly subdivided to that level or extract displacement/normal maps that can be applied to your animated mesh at render time.
Subdivide when you need, where you need, as much as you need.